Old Car Radio Not Working? How to Clean and Check Connections
If your old car radio suddenly stops working, it can feel frustrating. Music, news, and traffic updates make driving more enjoyable, so when your radio is silent, you want a quick fix. For beginners, understanding how to clean and check the radio connections is a practical first step. Many times, the problem is simple—dust, loose wires, or a weak connection. This guide explains how to safely inspect, clean, and troubleshoot your old car radio, using clear steps and practical tips that anyone can follow.
Basic Checks Before Cleaning
Before you grab tools or cleaners, it’s important to check a few simple things. These checks can save you time and prevent unnecessary work.
- Is the radio display turning on? If not, the issue might be with power, not connections.
- Check the fuse: Most radios have a fuse in the car’s fuse box. If the fuse is blown, replace it with one of the same rating.
- Try another function: If your radio has CD or AUX, test those. If everything is dead, it’s likely a power issue.
- Volume and mute settings: Sometimes, the radio is simply muted or the volume is too low.
Many car owners overlook these basics. A study by AAA found that over 20% of car radio issues were solved by checking the fuse or adjusting settings.
Tools And Materials You’ll Need
Having the right tools makes the job easier and safer. For cleaning and checking connections, you’ll need:
- Screwdriver set (usually Phillips and flathead)
- Soft cloth
- Cotton swabs
- Isopropyl alcohol (at least 70%)
- Compressed air
- Multimeter (for checking voltage)
- Plastic pry tool (optional, for removing panels)
- Flashlight
These items are affordable and easy to find. You don’t need expensive or specialized tools.
Credit: www.autozone.com
How To Remove The Car Radio Safely
To clean and check connections, you often need to remove the radio from the dashboard. Follow these steps:
- Turn off the car: Always start with the ignition off.
- Disconnect the battery: Remove the negative terminal to avoid electric shock.
- Locate screws and clips: Most radios are held by screws or clips. Use the screwdriver or pry tool.
- Pull out the radio gently: Don’t force it. Wiggle it if needed.
- Check the wiring: Look for loose or frayed wires behind the radio.
Many beginners damage clips or scratch panels by rushing. Take your time and use a flashlight to see small parts clearly.
Cleaning The Radio And Connections
Dust and dirt can block signals and cause poor connections. Here’s how to clean the radio and its connectors:
Exterior Cleaning
- Use a soft cloth to wipe the radio face.
- For buttons and small gaps, use cotton swabs dipped in isopropyl alcohol.
- Blow out dust with compressed air.
- Never spray water or cleaner directly on the radio.
Connector Cleaning
- Inspect all connectors for dirt, rust, or corrosion.
- Dip a cotton swab in alcohol and gently clean the metal contacts.
- Let everything dry fully before reconnecting.
- If you see greenish corrosion, rub lightly but avoid damaging the metal.
Speaker Wires
- Clean speaker wire ends with alcohol.
- Make sure wires are not frayed or broken.
Antenna Connection
- The antenna plug is usually a thick wire with a metal end.
- Wipe it with alcohol and check for bends or damage.
A common mistake is using too much liquid, which can damage electronics. Always use small amounts and let parts dry.
Credit: www.crutchfield.com
Checking The Radio Connections
After cleaning, it’s time to check if the connections are secure and working. Many problems come from loose or broken wires.
Inspecting The Wiring Harness
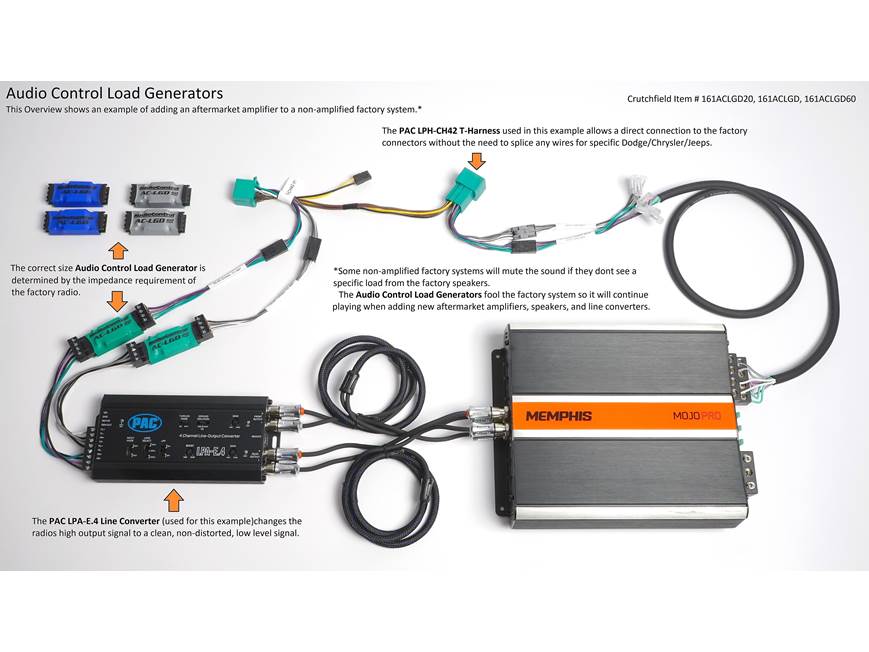
- The wiring harness is the main group of wires connecting the radio to the car.
- Make sure the connector fits snugly and is not loose.
- Check for broken, cut, or melted wires.
Testing With A Multimeter
A multimeter can check if the radio is getting power. Here’s how:
- Set the multimeter to DC voltage.
- Touch the black probe to the car’s ground (metal part).
- Touch the red probe to the radio’s power wire (usually red or yellow).
- You should see 12–14 volts. If not, there may be a power issue.
Speaker Connections
- Check each speaker wire for tightness.
- Test the wires for continuity (connection from end to end).
- If the sound is distorted, the wire may be damaged.
Antenna Wire Check
- Make sure the antenna wire is plugged in fully.
- Try wiggling the wire gently—if the signal improves, the connection was loose.
Here’s a simple comparison of common radio connection problems and their solutions:
| Problem | Possible Cause | Solution |
|---|---|---|
| No power | Blown fuse, loose power wire | Replace fuse, secure wire |
| No sound | Loose speaker wire, bad speaker | Reconnect wire, test speaker |
| Weak signal | Loose antenna, dirty contacts | Clean and reconnect antenna |
| Distorted sound | Damaged wire, corroded contact | Replace wire, clean contact |
Reconnecting And Testing The Radio
Once everything is clean and checked, put the radio back in the dashboard.
- Reconnect all wires and the wiring harness.
- Plug in the antenna wire.
- Screw the radio back in place.
- Reconnect the car battery.
- Turn on the radio and test all functions (FM, AM, AUX, CD).
- Listen for clear sound and check the display.
Many beginners forget to test all functions. Always check every mode and speaker.
Common Mistakes Beginners Make
Understanding what can go wrong helps you avoid problems. Here are frequent errors:
- Skipping battery disconnection: This can cause shocks or damage electronics.
- Forcing the radio out: Breaking clips or damaging the dashboard.
- Using too much liquid: Risk of short circuits.
- Not letting parts dry: Moisture can cause failure.
- Not checking all wires: Missing a loose wire can keep the radio silent.
More than half of DIY radio repairs fail due to missing one simple step, according to a survey by Car Audio Magazine.
Signs Your Radio Needs More Than Cleaning
Sometimes, cleaning and checking connections will not fix the problem. Look for these signs:
- Radio still won’t turn on: Even after checking power and fuse.
- Burnt smell: Indicates possible internal damage.
- Display flickers: Could be a failing circuit board.
- No improvement after cleaning: Might need professional repair.
Here’s a quick comparison of when to DIY and when to seek help:
| DIY Possible | Professional Needed |
|---|---|
| Loose wire | Burnt smell |
| Dirty contacts | No power after fuse replaced |
| Weak signal | Display not working |
| Speaker connection | Water damage |
Practical Tips For Beginners
- Take photos: Before removing wires, snap pictures for easy reassembly.
- Label wires: Use tape to mark wires if there are many.
- Work in daylight: Better visibility for small parts.
- Keep screws safe: Use a small container to avoid losing them.
- Don’t rush: Patience prevents mistakes.
Many beginners overlook labeling wires, which can lead to confusion later. Photos and labels make reassembly much easier.
How Often Should You Clean And Check Connections?
Car radios don’t need frequent cleaning, but regular checks help prevent issues.
- Every 6–12 months: Clean connectors and check wiring if you live in a dusty area.
- After any water leak: Inspect immediately to avoid corrosion.
- Before long trips: Test radio functions to ensure everything works.
Cars in humid climates may need more frequent cleaning. Dust and moisture are common causes of radio problems.
Credit: www.ebay.com
Understanding Different Radio Types
Older cars use different types of radios. Knowing your radio type helps with troubleshooting.
Factory Radios
- Installed by the car manufacturer.
- Usually have standard wiring and connectors.
- Easier to find manuals and guides.
Aftermarket Radios
- Installed later, often for better features.
- Wiring may be different or use adapters.
- Check the manual for correct wiring.
Cassette And Cd Radios
- Older models may have cassette or CD slots.
- Extra connections for these features.
- Cleaning cassette slot: Use a cassette cleaning kit.
If you’re unsure about your radio type, look for a model number or ask a mechanic.
When To Replace Your Old Car Radio
If cleaning and checking connections doesn’t fix the radio, you may need to replace it.
- Average lifespan: Car radios last 10–15 years.
- Cost: Basic radios start at $30, advanced ones can cost $200+.
- Installation: Many stores offer installation for a fee.
Here’s a quick comparison of repair vs. replacement:
| Repair | Replacement |
|---|---|
| Cheaper | More features |
| Quick fix | Long-term solution |
| No new wiring needed | May need new adapters |
| Keep original look | Modern appearance |
If you want step-by-step radio replacement instructions, check guides from trusted sources like Crutchfield.
Frequently Asked Questions
Why Does My Old Car Radio Lose Sound Sometimes?
Loose or dirty speaker wires are a common cause. Cleaning the connectors and checking for secure connections usually solves this.
Can I Clean My Car Radio With Regular Household Cleaners?
No, only use isopropyl alcohol and soft cloths. Household cleaners may damage the electronics and leave residue.
How Do I Know If The Antenna Is Causing The Problem?
If the radio has weak or no signal, try cleaning and reconnecting the antenna wire. Test by tuning to different stations.
What Should I Do If The Radio Still Doesn’t Work After Cleaning?
Check the power supply and fuse first. If everything seems fine, the issue may be inside the radio. Seek professional help.
Is It Safe To Clean The Radio While It’s Still Installed?
For basic surface cleaning, yes. For deep cleaning or checking connections, always remove the radio and disconnect the battery first.
Cleaning and checking connections is a simple, cost-effective way to fix an old car radio. With careful steps and the right tools, most beginners can solve common issues. If the radio still doesn’t work after these steps, don’t hesitate to ask a professional.
Your car’s music and entertainment can be restored with a little patience and effort.