How Much Dynamat Do I Need? A Complete Installation Guide
If you want your car to feel quieter, with less vibration and road noise, you may have heard about Dynamat. This material is popular for soundproofing vehicles. But one big question for beginners is: How much Dynamat do I need? Getting the right amount helps you save money, avoid waste, and get the best results. This guide is made for newcomers, with easy explanations, practical examples, and clear data. You’ll learn how to measure, plan, and buy the right quantity for your specific project.
What Is Dynamat And Why Use It?
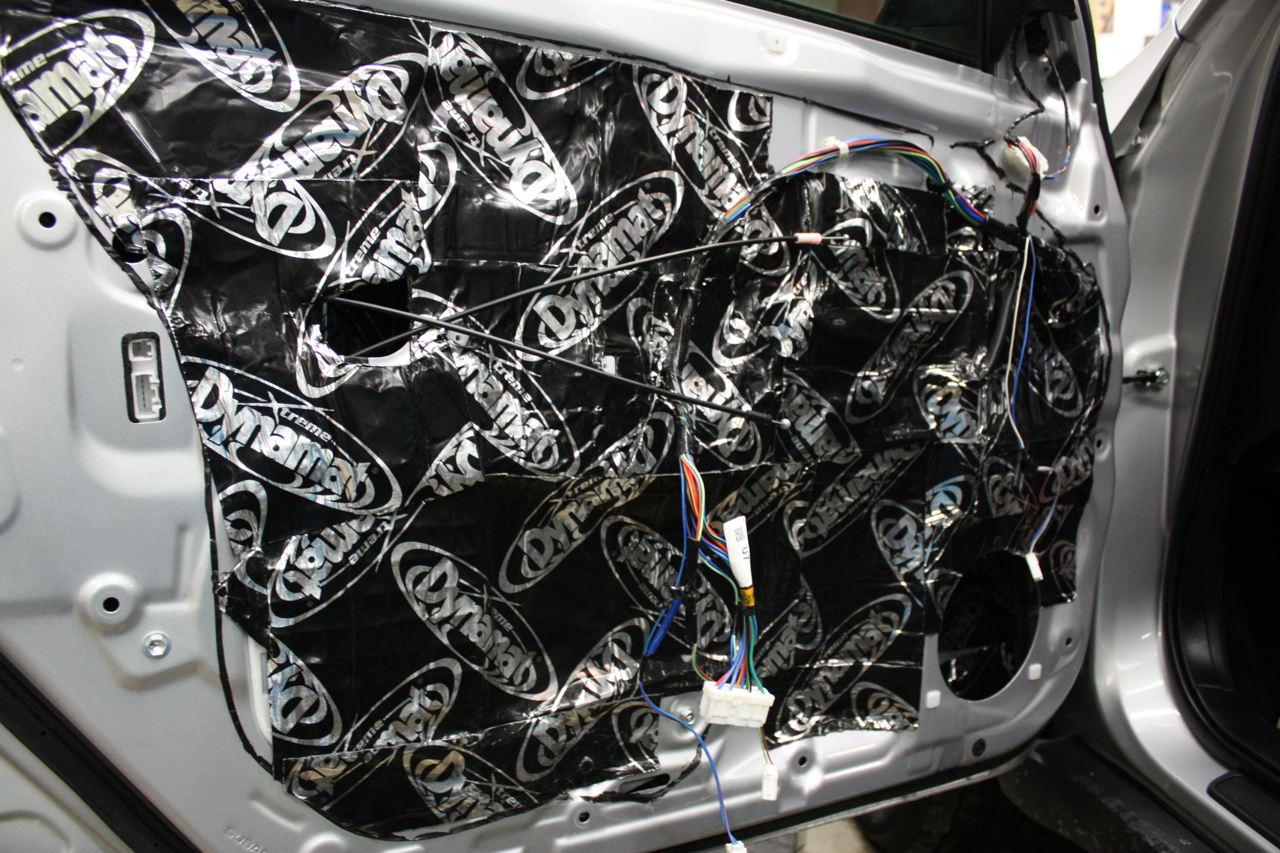
Dynamat is a flexible sheet made from butyl rubber and aluminum. It sticks to surfaces inside your car to reduce noise, vibration, and rattles. People use it mostly in:
- Car doors
- Floors
- Roofs
- Trunks
- Hood areas
- Speaker areas
Dynamat works by blocking and absorbing sound waves. This makes your car interior quieter, music clearer, and driving more comfortable.
Real Benefits For Beginners
- Less road noise from tires and wind
- Music sounds cleaner and bass is stronger
- Reduces vibration from panels and speakers
- Makes your car feel more premium inside
Types Of Dynamat And Package Sizes
Dynamat comes in different sizes and packs. Knowing these helps you pick the right option.
- Dynamat Xtreme: Most popular, used for doors, floors, and more
- Dynamat SuperLite: Lighter, for simple jobs
- Dynamat Hood Kit: Special for engine areas
Typical pack sizes include:
- Door Kit: Covers about 9 square feet (2 sheets)
- Wedge Pack: Covers 12 square feet (3 sheets)
- Bulk Pack: Covers 36 square feet (9 sheets)
- Trunk Kit: Covers 20 square feet (5 sheets)
Each sheet is usually 18″x32″ (1. 5 feet x 2. 66 feet).
Quick Comparison Table
Here’s a simple table to compare popular Dynamat kits:
| Kit Name | Sheets | Total Area (sq ft) | Best For |
|---|---|---|---|
| Door Kit | 2 | 9 | Small doors, speakers |
| Wedge Pack | 3 | 12 | Partial floor, roof |
| Bulk Pack | 9 | 36 | Full car, big project |
| Trunk Kit | 5 | 20 | Trunk area |
Credit: carstereochick.com
How To Calculate How Much Dynamat You Need
To avoid buying too much or too little, follow these steps:
- Identify Areas You Want to Treat
- Doors, floor, roof, trunk, hood, wheel wells
- Measure Each Area
- Use a tape measure
- Write down length and width in feet
- Calculate Total Square Feet
- Multiply length x width for each area
- Add up all areas for a total
Example:
- Car Door: 3 ft x 2 ft = 6 sq ft (per door)
- Floor: 5 ft x 4 ft = 20 sq ft
- Trunk: 4 ft x 3 ft = 12 sq ft
If you do two doors, floor, and trunk:
- 6 sq ft x 2 (doors) = 12 sq ft
- Floor = 20 sq ft
- Trunk = 12 sq ft
- Total = 44 sq ft
- Check Dynamat Pack Sizes
- Bulk Pack (36 sq ft) is not enough for 44 sq ft
- You need Bulk Pack (36 sq ft) + Wedge Pack (12 sq ft) = 48 sq ft (enough)
Common Car Areas And Average Sizes
Here’s another helpful table with typical sizes for standard cars:
| Car Area | Avg. Size (sq ft) | Recommended Kit |
|---|---|---|
| Front Door (each) | 6-7 | Door Kit |
| Rear Door (each) | 5-6 | Door Kit |
| Floor | 20-25 | Bulk Pack |
| Roof | 10-15 | Wedge Pack |
| Trunk | 12-15 | Trunk Kit |
| Hood | 5-7 | Hood Kit |
Practical Examples: Typical Dynamat Needs
Let’s look at three real situations:
1. Basic Door And Speaker Upgrade
- Goal: Treat two front doors for better sound
- Each door: About 6 sq ft
- Total: 12 sq ft
- Needed: Wedge Pack (12 sq ft) or two Door Kits
2. Full Car Treatment
- Goal: Quiet entire car (sedan)
- Floor: 22 sq ft
- Doors: 4 x 6 sq ft = 24 sq ft
- Roof: 12 sq ft
- Trunk: 13 sq ft
- Total: 71 sq ft
- Needed: Two Bulk Packs (36 sq ft each) = 72 sq ft
3. Trunk For Subwoofer
- Goal: Stop trunk rattle
- Trunk: 14 sq ft
- Needed: Trunk Kit (20 sq ft)
Non-obvious Insight
Many beginners forget to measure complex shapes. If your door has curves or holes, add about 10% extra material to your total. It’s better to have a little more than not enough, especially for tricky areas.
Coverage Tips: How Much Coverage Is Enough?
You don’t always need to cover 100% of every surface. Here’s what works:
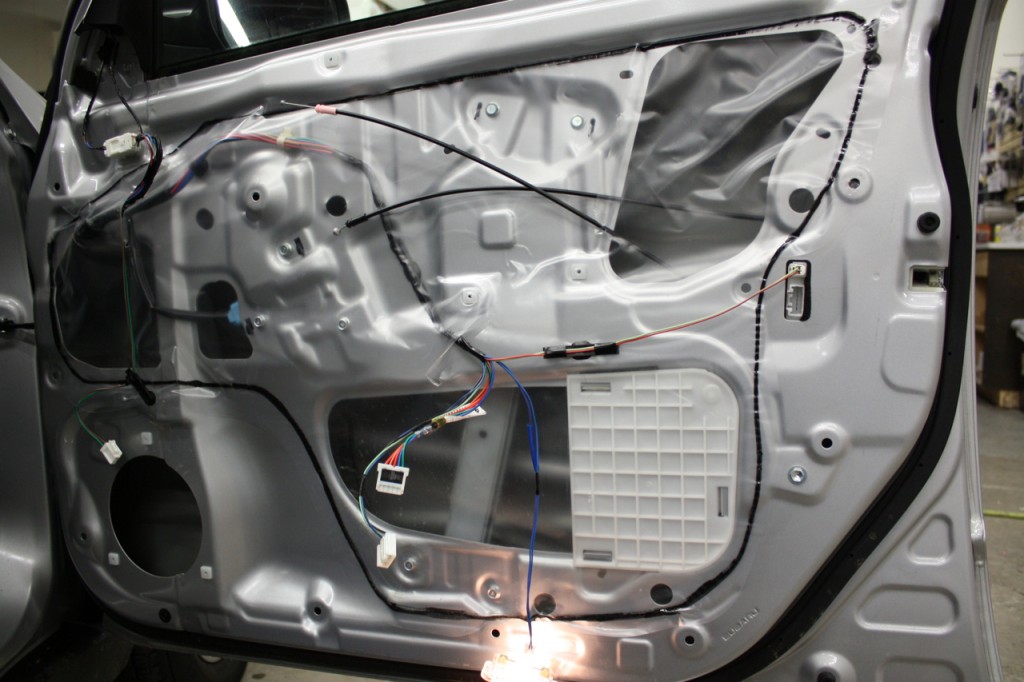
- Doors: Cover most flat panels, especially around speakers
- Floor: Cover main flat area, skip under seats if budget is tight
- Roof: Cover central area, edges are less important
- Trunk: Cover panels facing the inside and near subwoofers
Covering 60–80% gives good results for most people. Covering 100% is best for luxury or show cars, but you can save money by focusing on the noisiest spots.
Mistakes Beginners Make
- Underestimating area: Always measure, don’t guess
- Not adding extra for curves and overlaps
- Buying small packs for big jobs: Costs more per square foot
- Ignoring product thickness: Thicker sheets absorb more sound
How Dynamat Thickness And Layering Affect Quantity
Dynamat comes in different thicknesses, but the standard is about 0. 067 inches (1. 7 mm). You can add a second layer for more soundproofing, but it’s not needed for most cars.
- One layer is enough for doors, floors, and trunk
- Two layers only for extreme cases (high-end audio, competition)
If you plan to double up, you’ll need twice as much material.

Credit: www.dynamat.com
Buying Dynamat: Saving Money And Avoiding Waste
To get the best value:
- Buy larger packs if covering big areas
- Check if you can use leftover pieces for small spots (like speaker holes)
- Don’t buy too much—returns can be hard
- Compare prices at auto shops and online
Bulk packs give lower cost per square foot. For example, a Bulk Pack (36 sq ft) can cost $180, while Door Kits (9 sq ft) are $60. That’s $5 per sq ft for bulk, $6. 67 for small packs.
Step-by-step Guide: Planning Your Dynamat Project
Follow these simple steps:
- List all areas you want to cover
- Measure each area’s length and width
- Calculate total square feet
- Add 5–10% for curves and overlaps
- Pick the right packs
- Buy a little extra for mistakes
Example For A Compact Sedan
- Front Doors: 2 x 6 sq ft = 12 sq ft
- Rear Doors: 2 x 5 sq ft = 10 sq ft
- Floor: 20 sq ft
- Trunk: 12 sq ft
- Roof: 10 sq ft
- Total: 64 sq ft
- Add 10% extra: 7 sq ft
- Final total: 71 sq ft
- Buy: Two Bulk Packs (72 sq ft)
Choosing Dynamat Vs. Other Brands
Dynamat is not the only brand, but it’s known for quality. Other brands, like Noico or Hushmat, can cost less but may not stick as well or last as long. Beginners often prefer Dynamat for ease of use.
Comparison Table: Dynamat Vs. Other Brands
| Brand | Average Price (per sq ft) | Thickness | Performance |
|---|---|---|---|
| Dynamat Xtreme | $5.00 | 1.7 mm | High |
| Noico | $2.50 | 2.0 mm | Medium |
| Hushmat | $3.00 | 1.5 mm | Medium |
Final Tips For Beginners
- Measure carefully before buying
- Start with noisy areas first (doors, trunk)
- Buy a little extra for mistakes or missed spots
- Watch out for product thickness and quality
- Don’t cover areas where heat builds up (like exhaust or engine parts)
Non-obvious Insight
If you live in a hot climate, Dynamat can also help block heat from the roof and floor. This makes your car cooler inside, not just quieter.
Credit: carstereochick.com
Frequently Asked Questions
How Do I Measure My Car Doors For Dynamat?
Use a tape measure to find the length and width of the inside door panel. Multiply these numbers for the area in square feet. Add extra for curves or holes.
Can I Use Dynamat Only Around Speakers?
Yes, you can apply Dynamat just around the speaker area. This reduces vibrations and improves sound. For best results, cover the main flat panel nearby.
What If I Buy Too Little Dynamat?
If you run out, buy another pack. Try to buy all your packs at once so the sheets match in thickness and color. It’s better to have a little extra than not enough.
Does Dynamat Help With Heat?
Yes, Dynamat can block some heat from the sun or engine areas. It’s mostly for sound, but the aluminum layer reflects heat, making your car cooler.
Is Dynamat Difficult To Install?
No, Dynamat is easy for beginners. Clean the area, cut sheets with scissors, peel the backing, and stick. Use a roller for best results.
If you want a quieter, more comfortable car, measuring and planning your Dynamat project carefully will help you buy the right amount, avoid waste, and get the best results. For more technical details or advanced guides, visit the official Dynamat website. With the right approach, even beginners can achieve a professional outcome.