2010 Camaro SS Speaker Upgrade Guide: Boost Your Audio Experience
The 2010 Camaro SS is a true muscle car, but its factory sound system often leaves enthusiasts wanting more. If you love music, upgrading the speakers can change your driving experience. Good speakers bring out the power in your favorite songs, deliver clear vocals, and boost the bass.
Many Camaro owners find that a speaker upgrade is the most noticeable and satisfying audio improvement.
This guide is designed for beginners who want step-by-step advice. You’ll learn what you need, what to avoid, and how to get the best results. Whether you want strong bass or crisp sound, this article will help you make smart choices for your 2010 Camaro SS speaker upgrade.
Why Upgrade Your 2010 Camaro Ss Speakers?
The stock speakers in the 2010 Camaro SS are not bad, but they have limits:
- Sound quality is average, especially at high volume.
- Bass response is weak for music with deep low notes.
- Speaker materials wear out over time, causing distortion.
Upgrading your speakers means:
- Music sounds clearer and more lively.
- You enjoy deeper bass and smoother highs.
- The system can handle higher volume without problems.
Many owners notice a huge difference right away. It’s one of the best first upgrades for your Camaro.
Understanding Your Camaro’s Speaker System
The 2010 Camaro SS audio system varies by trim and options:
- Base system: 6 speakers, no subwoofer.
- Boston Acoustics upgrade: 9 speakers, including a subwoofer.
Speaker locations:
- Front doors: 6.5″ woofers and tweeters
- Dash corners: Tweeters (with Boston Acoustics)
- Rear side panels: 6.5″ speakers
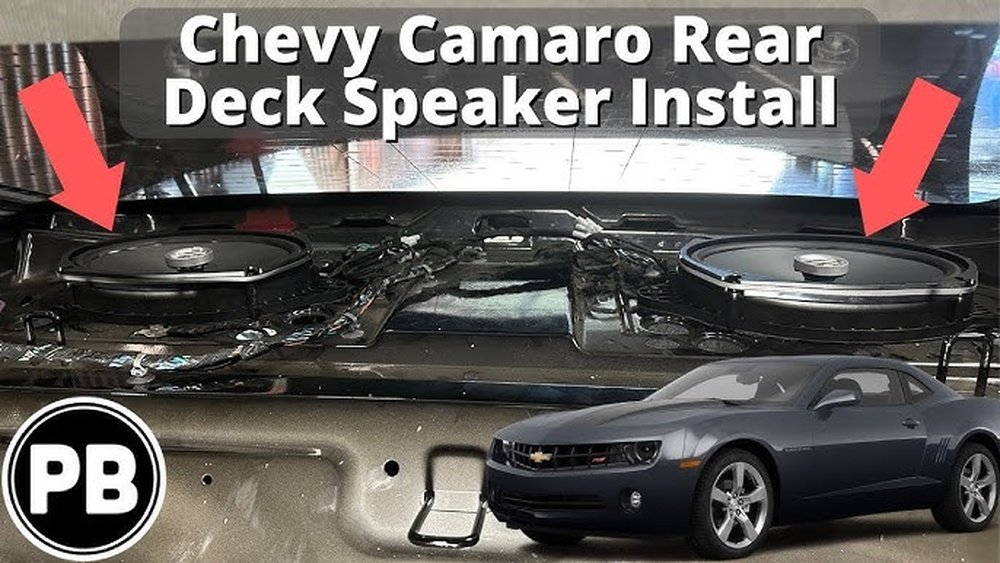
- Rear deck: Subwoofer (with Boston Acoustics)
Knowing your system helps you buy the right upgrades. Removing a door panel or trim takes about 20 minutes per door with common tools.
Factory Speaker Sizes
Most 2010 Camaro SS models use these sizes:
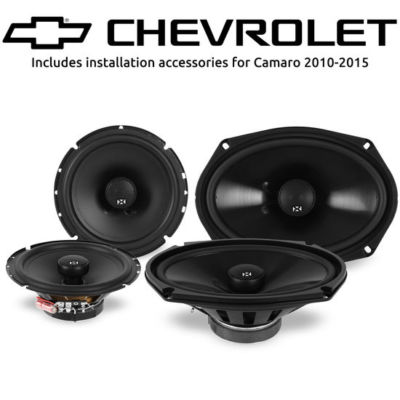
- Front door: 6.5″ (165mm) component speakers
- Dash: 1″ tweeters
- Rear side: 6.5″ (165mm) coaxial speakers
- Subwoofer: 8″ (Boston Acoustics only)
Always measure before buying—sometimes mounting depth matters.
Choosing The Right Replacement Speakers
Not all speakers sound the same. Here’s what to look for:
- Speaker type: Component sets (separate woofer and tweeter) give the best sound up front. Coaxial speakers (all-in-one) are easier to install in the rear.
- Power handling: Look for speakers with RMS ratings close to your head unit or amp’s output. For the stock radio, 30–60 watts RMS is fine. If you add an amp, go higher.
- Sensitivity: Higher sensitivity (90dB+) means louder sound with less power—good for factory stereos.
- Build quality: Look for rubber surrounds, silk or aluminum tweeters, and polypropylene or woven cones for long life.
Some good brands for beginners are JBL, Infinity, Rockford Fosgate, and Kicker. These offer good sound and value.
Example: Comparing Two Popular Speakers
Here’s a quick look at two 6.5″ speakers:
| Brand & Model | Sensitivity (dB) | RMS Power | Type | Price Range |
|---|---|---|---|---|
| JBL GTO629 | 93 | 60W | Coaxial | $70–$90 |
| Infinity Reference 6530CX | 93 | 90W | Component | $110–$150 |
Both are good options for the Camaro. Choose based on your budget and whether you want separate tweeters.
What You Need For The Upgrade
Before starting, gather these items:
- New speakers (front and rear)
- Speaker wiring adapters (to avoid cutting factory wires)
- Speaker mounting brackets (for a perfect fit)
- Basic tools: Phillips screwdriver, panel removal tool, socket set
- Foam tape (optional, for reducing rattles)
Optional:
- Amplifier (for more power and better sound)
- Sound deadening material (for less road noise)
Most upgrades take 2–4 hours for a beginner.

Credit: www.amazon.com
Step-by-step Installation Guide
1. Disconnect The Battery
Always start by disconnecting the negative terminal of the battery. This keeps you safe and avoids electrical shorts.
2. Remove Door Panels
- Use a panel removal tool to pop off the trim pieces.
- Remove screws near the handle and armrest.
- Carefully lift the panel away.
Take your time—plastic clips can break if forced.
3. Remove The Old Speakers
- Unscrew the factory speaker.
- Unplug the wiring connector.
Save screws, as you may need them for new speakers.
4. Install New Speakers
- Use adapter brackets to fit aftermarket speakers.
- Connect speaker wiring adapters to avoid cutting wires.
- Mount the new speaker and tighten screws.
Add foam tape around the speaker for a better seal and less vibration.
5. Test The Speakers
Before reassembling the door, reconnect the battery and play music. Check for:
- Sound from each speaker
- No distortion
- Proper balance between left and right
If all sounds good, move to the next door.
6. Reassemble Door Panels
- Reverse the removal steps.
- Snap panels back in place.
- Replace screws and trim pieces.
Take care to line up all clips before pushing the panel.
7. Upgrade Rear Speakers
Repeat similar steps for rear side panel speakers. You may need to remove seat cushions or trim.
8. Upgrade Subwoofer (if Equipped)
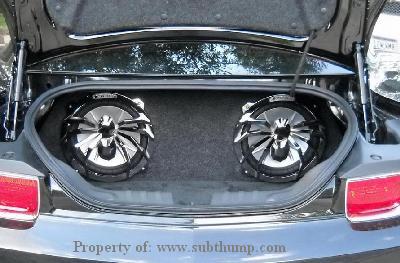
If you have the Boston Acoustics system, replacing the subwoofer is more advanced. Consider a professional if you want to add a larger or more powerful sub.
Example: Installation Time Estimate
Here’s a rough idea for a beginner:
| Speaker Location | Time (per side) | Difficulty |
|---|---|---|
| Front Door | 40 min | Easy |
| Rear Side Panel | 30 min | Moderate |
| Subwoofer | 60 min | Advanced |
Should You Add An Amplifier?
Factory stereos don’t provide much power. If you want louder sound or use high-end speakers, a small amplifier helps a lot.
Benefits:
- More volume without distortion
- Better bass and clarity
- Speakers last longer when powered correctly
A 4-channel amp (50–75W RMS per channel) is enough for most upgrades.
Installing An Amp
- Use a wiring kit for power and ground.
- Find a good mounting spot (usually the trunk).
- Run speaker wires from the amp to the doors.
- Use line-out converters if keeping the factory head unit.
If this sounds complex, a car audio shop can do it for you.
Credit: subthump.com
Common Mistakes To Avoid
Beginners often make these errors:
- Buying the wrong size. Always measure your factory speakers and check depth.
- Skipping wiring adapters. Cutting factory wires makes future upgrades harder.
- Ignoring sensitivity. Low-sensitivity speakers sound weak on stock power.
- Not testing before reassembly. It’s frustrating to remove panels again to fix a loose wire.
- Over-tightening screws. This can crack speaker frames.
Take your time and double-check each step.
How Much Does A Camaro Speaker Upgrade Cost?
Costs vary by your choices:
- Budget setup: $100–$200 (entry-level speakers, DIY)
- Mid-range: $300–$500 (better speakers, maybe an amp)
- Premium: $700+ (top speakers, amp, sound deadening)
Installing yourself saves money. Shops may charge $100–$200 for labor.
Two Non-obvious Beginner Insights
- Speaker location matters: The front speakers matter most for sound quality. Spend more here if your budget is tight.
- Sound deadening pays off: Adding sound deadener behind the speakers (like Dynamat) makes even average speakers sound better by reducing vibrations and road noise. It’s a smart upgrade most beginners skip.
When To Get Professional Help
If you want to add a new subwoofer, custom amp, or change the factory radio, professional installation is a good idea. Shops have special tools and experience, and can avoid issues with your Camaro’s electrical system.
For simple speaker swaps, most beginners can do the job in a weekend with basic tools.
Credit: www.ebay.com
Recommended Resources
For more details on car audio basics and wiring guides, check out Crutchfield’s Car Audio Learning Center.
Frequently Asked Questions
What Size Speakers Fit In The 2010 Camaro Ss?
The front and rear side panels use 6.5-inch speakers. The dash corners hold 1-inch tweeters (Boston Acoustics only). The optional subwoofer is 8 inches.
Will New Speakers Work With My Factory Radio?
Yes, most aftermarket speakers work with the stock radio. For best sound, choose high-sensitivity models and use speaker wiring adapters.
Do I Need An Amplifier For Better Sound?
An amplifier is not required, but it helps. Adding one means louder, cleaner sound and allows premium speakers to perform their best.
Is It Hard To Install New Speakers Myself?
For most people, swapping speakers is a beginner-friendly project. Basic tools and patience are all you need. Watching video guides can help.
Can I Keep My Boston Acoustics System And Just Add Speakers?
Yes, you can upgrade speakers and keep the rest of the Boston Acoustics system. Just match the impedance (usually 4 ohms) and use proper adapters for best results.
Upgrading the speakers in your 2010 Camaro SS is a smart way to enjoy every drive, whether you love classic rock, hip hop, or podcasts. With the right parts and a little time, even beginners can achieve a sound system that matches the power of the Camaro itself.
Take your time, choose quality parts, and enjoy the results on every ride.