Upgrading Your 2009 Nissan Altima Head Unit: Ultimate Guide
Upgrading Your 2009 Nissan Altima Head Unit
If you drive a 2009 Nissan Altima, you might notice the factory head unit feels outdated. Music quality, Bluetooth, navigation, and smartphone integration are missing or limited. Upgrading your head unit is one of the most popular modifications for Altima owners. It can transform your driving experience, add modern features, and even boost resale value. This guide will walk you through everything you need to know, step by step, with beginner-friendly advice and practical examples.
Why Upgrade Your Altima Head Unit?
The original head unit in the 2009 Altima lacks features most drivers expect today. Here’s why upgrading matters:
- Better sound quality: Aftermarket units often have improved amplifiers and equalizers, making music and podcasts clearer and richer. You’ll notice deeper bass and crisper highs, especially if you use good speakers.
- Bluetooth support: Make hands-free calls and stream music wirelessly. This helps you avoid fines for phone use while driving and keeps your focus on the road.
- Smartphone integration: Use Apple CarPlay or Android Auto for navigation, calls, and apps. This means you can access your favorite apps, playlists, and maps on the head unit screen—no more juggling your phone.
- Touchscreen controls: Easier to use, especially while driving. A touchscreen lets you change songs, adjust volume, or switch apps with a simple tap or swipe, reducing distraction.
- Modern look: A new head unit refreshes your car’s interior. It can make your dashboard look sleek and stylish, with customizable lights and settings.
Many Altima owners report that an upgraded head unit is one of the most noticeable improvements they’ve made. It’s a change you experience every time you drive, and it’s especially helpful if you spend a lot of time in your car.
What You Need Before Replacing The Head Unit
Preparation is key for a smooth upgrade. Here’s what you’ll need:
- Replacement head unit: Choose one that fits your needs and budget. Decide if you want a basic unit or one with advanced features like navigation, large touchscreen, or voice control.
- Wiring harness adapter: Allows you to connect the new unit without cutting factory wires. This keeps your car’s original wiring intact, so you can return to stock if needed.
- Dash kit: Fills in gaps and ensures a snug fit in your Altima’s dashboard. Dash kits come in different colors and finishes, so you can match your interior.
- Antenna adapter: Needed for radio connection. Without this, you won’t get good radio reception.
- Basic tools: Screwdrivers, panel pry tools, wire crimpers, and electrical tape. Some kits include tools, but it’s safer to have your own.
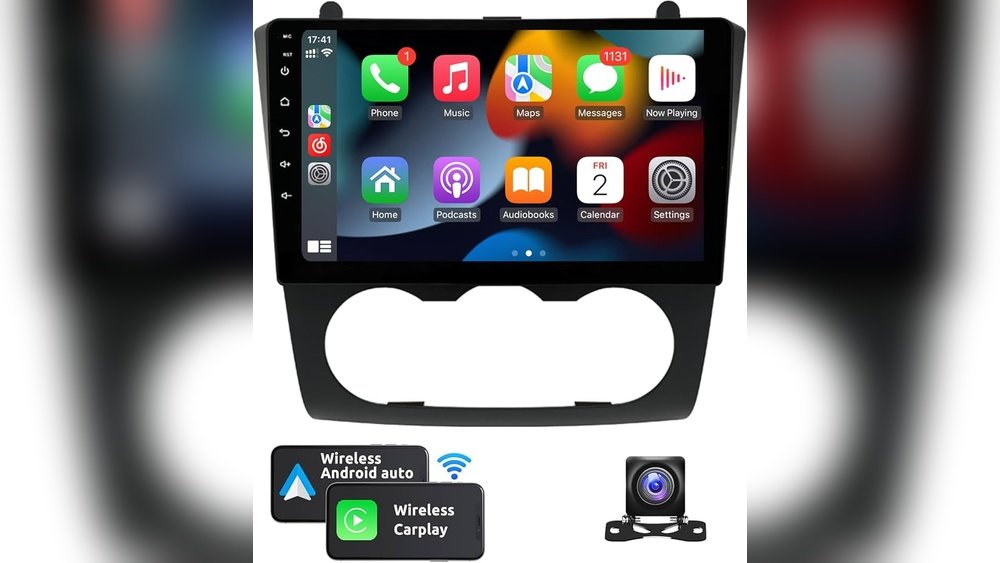
Check your new head unit’s size. The 2009 Altima uses a double-DIN opening, so double-DIN units fit best. A single-DIN unit will need a pocket or extra trim to fill the space.
Choosing The Right Head Unit
Picking the right head unit depends on your needs. Here are key factors to consider:
- Screen size: Larger screens are easier to use but may cost more. A 7-inch screen offers good visibility, but even 6-inch screens are clear.
- Features: Bluetooth, USB ports, navigation, CarPlay, Android Auto. Think about the features you use daily—if you’re always on your phone, CarPlay or Android Auto are worth it.
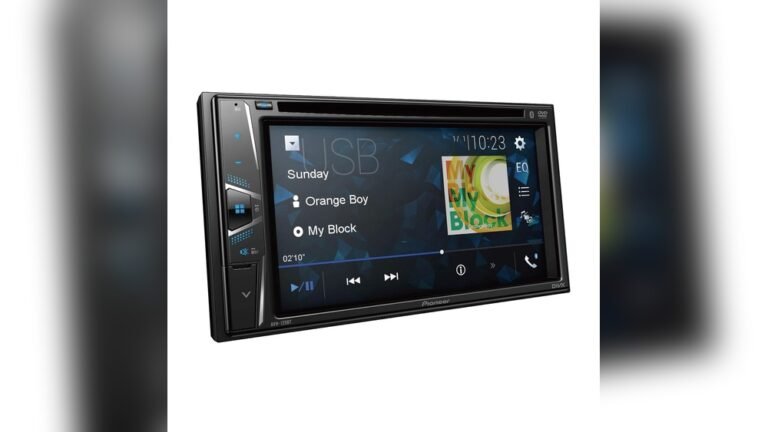
- Brand reliability: Popular brands include Pioneer, Kenwood, Sony, and Alpine. Trusted brands offer better customer support and fewer technical issues.
- Budget: Prices range from $100 for basic models up to $600+ for advanced units. Set your budget first, then look for units with the most features in your price range.
Example: If you want to use navigation and hands-free calls, look for a unit with Apple CarPlay or Android Auto. Some models include built-in GPS, while others use your phone’s map app.
Common Mistakes When Choosing
- Ignoring compatibility: Not all units fit every car. Always check that the unit matches your Altima’s size and wiring.
- Overpaying for features you won’t use. If you don’t use navigation or voice control, don’t pay extra for them.
- Forgetting about wiring adapters or dash kits. Missing these can delay your installation and add unexpected costs.
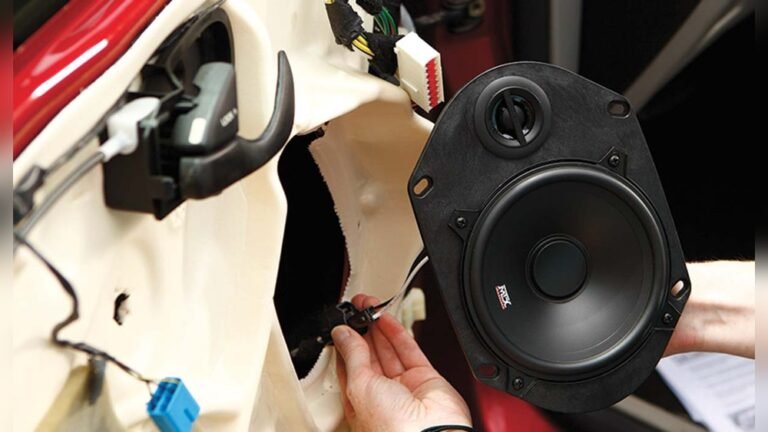
Step-by-step Guide: Installing A New Head Unit
Installing a head unit can be easy with the right steps. Here’s a beginner-friendly approach:
- Disconnect the car battery to avoid electrical shorts. This protects both you and your car’s electronics.
- Remove the dashboard trim using panel tools. Start from edges, gently lift. Take your time—rushing can break plastic clips.
- Unscrew the old head unit and pull it out. Keep screws safe for later use.
- Disconnect factory wiring and antenna. If wires are tight, wiggle gently, don’t force.
- Connect wiring harness adapter to new head unit. Match color-coded wires or follow the adapter’s instructions.
- Attach antenna adapter. Make sure it clicks into place.
- Install dash kit (if needed). Most kits snap in, but some need screws.
- Slide new head unit into place, secure with screws. Check that it sits flush with the dash.
- Replace dashboard trim. Line up clips and press gently.
- Reconnect battery and test your new unit. Check all functions—radio, Bluetooth, speakers, and controls.
Most installations take 1–2 hours. If you’re unsure, many car audio shops offer installation for $100–$150. This includes labor and a warranty, which can give peace of mind.
Practical Data: Head Unit Feature Comparison
Here’s a practical comparison of three popular aftermarket head units for the 2009 Altima:
| Model | Screen Size | Bluetooth | CarPlay/Android Auto | Price (USD) |
|---|---|---|---|---|
| Pioneer AVH-2500NEX | 7″ | Yes | Yes | $350 |
| Kenwood DMX4707S | 6.8″ | Yes | Yes | $280 |
| Sony XAV-AX100 | 6.4″ | Yes | Yes | $320 |
If you’re on a budget, the Kenwood model is good value with all major features. These units also offer USB charging, which is useful for long drives.
Data Table: Installation Cost Breakdown
Let’s look at a basic cost breakdown for upgrading your Altima’s head unit:
| Item | Average Cost |
|---|---|
| Head Unit | $250 |
| Wiring Harness Adapter | $20 |
| Dash Kit | $30 |
| Antenna Adapter | $15 |
| Professional Installation | $120 |
| Total | $435 |
DIY installation can save you about $120, but professional help ensures no mistakes. Remember, if you need extra adapters or steering wheel interfaces, add those to your budget.

Credit: www.youtube.com
How To Keep Steering Wheel Controls
Many 2009 Altima models have steering wheel audio controls. If you want to keep these working with your new head unit:
- Buy a steering wheel control interface (cost: $40–$80). This device translates your steering wheel button signals for the new head unit.
- Check compatibility with your chosen head unit. Some interfaces work with specific brands, so confirm before ordering.
- Follow instructions to connect the interface during installation. Usually, you connect the interface to the wiring harness and program it for your car.
Not all interfaces work with every unit, so double-check before buying. If you skip this step, you’ll lose the convenience of volume and track controls on your steering wheel.
Non-obvious Insights For Beginners
- Check for factory amplifiers: Some Altima trims have a factory amp. If yours does, you’ll need a special harness adapter. Skipping this can cause poor sound or no audio. Look for “Bose” branding or check your car’s specs.
- Update firmware after install: Many new head units have software updates. Installing the latest firmware can fix bugs and add features. Visit the manufacturer’s website for instructions. This can also improve Bluetooth reliability and app compatibility.
Another tip: Test all features before finishing installation. It’s easier to fix problems when the dash is still open.
Example: Upgrading For Smartphone Use
Sarah, an Altima owner, upgraded to a Pioneer AVH-2500NEX for $350. She wanted:
- Hands-free calling
- Spotify streaming
- Google Maps navigation
After installation, she noticed:
- Calls were clearer, with less background noise
- Music sounded better, especially through upgraded speakers
- She could use her phone safely while driving, thanks to the touchscreen and voice controls
Sarah’s experience shows how a head unit upgrade can make driving safer and more enjoyable. She also found that her daily commute felt shorter and more comfortable.
Troubleshooting Common Issues
If you face problems during or after installation, here’s what to check:
- No power: Check battery connection and wiring harness. Make sure all plugs are fully seated.
- No sound: Make sure all speaker wires are connected; check for factory amplifier. If you hear static, double-check ground wires.
- Static or poor radio: Confirm antenna adapter is installed correctly. Sometimes, moving the adapter or checking the antenna cable helps.
- Steering wheel controls not working: Ensure the interface is compatible and installed properly. Try reprogramming the interface if needed.
Most issues are simple to fix. If you’re stuck, car audio forums or professional installers can help. Don’t be afraid to ask questions—many people have faced the same problems.

Credit: us.amazon.com
Professional Vs. Diy Installation
Should you install the head unit yourself or pay a professional?
- DIY pros: Save money, learn new skills, and customize the process. You can also choose your own parts and take your time.
- DIY cons: Risk of mistakes, no warranty on labor. If you damage trim or wiring, repairs can be costly.
- Professional pros: Fast, reliable, comes with warranty. Professionals can spot issues quickly and offer advice.
- Professional cons: Higher cost. You may have less control over how things are installed.
If you’re comfortable with basic tools, DIY is possible. If not, a pro is a safe choice. Some shops let you watch or ask questions, so you can learn for next time.
Table: Diy Vs. Professional Installation Pros And Cons
| DIY Installation | Professional Installation |
|---|---|
| Lower cost | Warranty on labor |
| Learning experience | Quick turnaround |
| Risk of mistakes | Higher cost |
| No labor warranty | Expert troubleshooting |
Safety Tips During Installation
- Always disconnect the battery before starting. This prevents electrical shocks and protects your car’s computers.
- Use plastic panel tools to avoid damaging trim. Metal tools can scratch or snap fragile parts.
- Double-check all wire connections. Loose wires cause most installation problems.
- Avoid rushing; take your time to prevent mistakes. If you get tired, take a break and come back refreshed.
If you drop a screw or lose a clip, check under seats and carpet—they often roll away.
Where To Buy Head Units And Accessories
Reliable places to buy head units and accessories include:
- Crutchfield
- Best Buy
- Amazon
- Local car audio shops
Compare prices and check for warranty. Online stores often have reviews and installation guides. For more details on car audio upgrades, visit Crutchfield.
Final Thoughts
Upgrading your 2009 Nissan Altima head unit is a smart move. It makes your car feel modern, improves safety, and adds value. With the right preparation, tools, and research, even beginners can handle the installation. Remember to check compatibility, use quality parts, and decide if DIY or professional help fits your comfort level. Whether you want better music, easier navigation, or just a cooler dashboard, the right head unit upgrade brings your Altima into the modern age. Don’t underestimate how much a new head unit can change your daily drive—it’s one of the best investments for comfort and convenience.
Frequently Asked Questions
How Hard Is It To Install A New Head Unit In A 2009 Altima?
For most beginners, it’s manageable with basic tools and patience. The hardest part is removing the dashboard trim. Total time is about 1–2 hours. If you get stuck, installation videos and guides can help.
Will I Lose Steering Wheel Audio Controls After Upgrading?
Not necessarily. You can keep them by using a steering wheel control interface. Make sure it’s compatible with your new head unit. Some units even let you customize button functions.
Do I Need Special Adapters For My Altima?
Yes. You’ll need a wiring harness adapter, dash kit, and antenna adapter. If your car has a factory amplifier, get the right harness for that too. Check online forums for your trim’s details.
Can I Connect My Smartphone To The New Head Unit?
Most modern head units support Bluetooth, Apple CarPlay, and Android Auto. Check the features before you buy to make sure your phone will work. USB ports and voice control add extra convenience.
What If My New Head Unit Doesn’t Fit?
Always check the size—your Altima uses a double-DIN opening. If it doesn’t fit, use a dash kit for proper installation. Avoid single-DIN units unless you want extra storage or a smaller screen. Dash kits help make the new unit look seamless in your car.

Credit: www.youtube.com