Sanptent Car Stereo Installation: Step-by-Step Guide for Beginners
Sanptent Car Stereo Installation: A Beginner-friendly Guide
Upgrading your car stereo can make a huge difference in your driving experience. Better sound, more features, and the ability to connect your phone or stream music all start with the right installation. If you are considering a Sanptent car stereo, you are in the right place. This guide explains each step in simple English, making it easy even for beginners.
You don’t need to be a car expert to install a Sanptent stereo. With the right tools, a clear plan, and some patience, you can do it yourself and save money. Let’s walk through everything you need to know, including practical tips, common mistakes, and real examples.
Why Choose Sanptent Car Stereo?
Sanptent is becoming a popular brand for car audio upgrades. Here’s why many drivers choose Sanptent:
- Affordable price: Compared to other brands, Sanptent offers more features for less money.
- Modern features: Bluetooth, touchscreen, USB, and Apple CarPlay/Android Auto support.
- Universal fit: Many models work with most cars.
- Easy installation: Designed for DIY users.
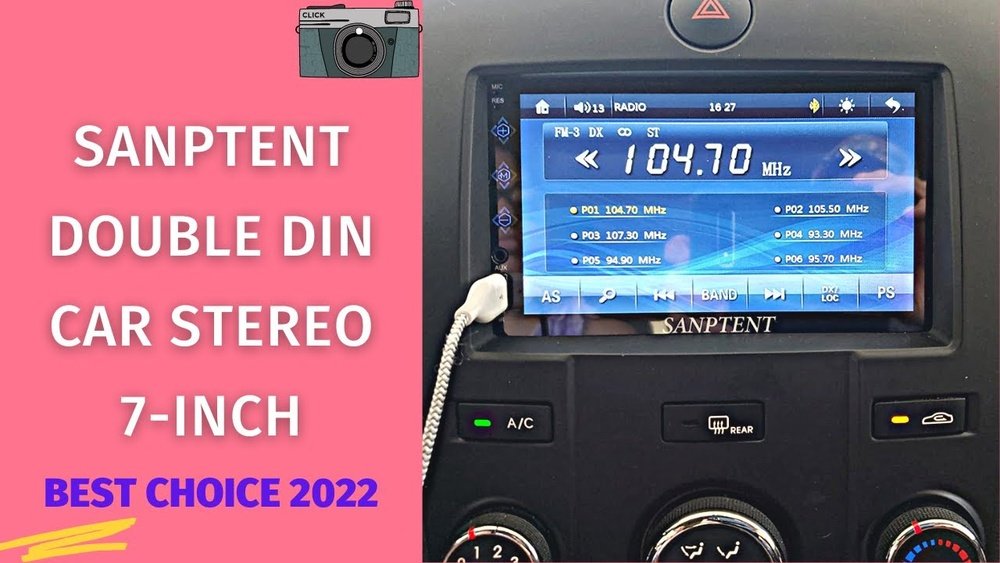
Many buyers say the sound quality is better than their factory stereo. For example, the Sanptent 7-inch model is one of the best-selling double din units on Amazon, with over 3,000 reviews and a 4. 3-star average rating.
What You Need Before Installation
Before you start, gather all the tools and parts. Here’s a checklist:
- Sanptent stereo unit (check your box for all included accessories)
- Wiring harness adapter (specific for your car make/model)
- Dash kit (if your car needs a special frame)
- Basic tools: Screwdriver, wire stripper, electrical tape, and trim removal tools
- Optional: Soldering kit or crimp connectors for secure wiring
Make sure your car’s battery is fully charged. Turn off the engine and disconnect the negative battery terminal before starting work.
Example: Tools Checklist
- Philips screwdriver
- Flathead screwdriver
- Wire cutter/stripper
- Electrical tape
- Panel removal tool
Having all tools ready will make the installation smoother.
Understanding Your Car’s Stereo System
Before removing anything, learn how your current car stereo is set up. Cars have different wiring and dash layouts. Some use single DIN, others double DIN (the size of the stereo slot).
Din Size Comparison
| DIN Type | Dimensions (inches) | Common Cars |
|---|---|---|
| Single DIN | 2 x 7 | Older models, some economy cars |
| Double DIN | 4 x 7 | Modern vehicles, SUVs, trucks |
Check your car’s manual or measure your stereo opening. Sanptent double DIN units need a 4 x 7 inch space.
Tip: Take a picture of your dashboard before you start. It helps you remember where everything goes.
Step-by-step Sanptent Car Stereo Installation
Let’s break down the installation process into easy steps.
1. Disconnect The Battery
- Always disconnect the negative battery terminal before working with car electronics. This prevents shorts and protects you.
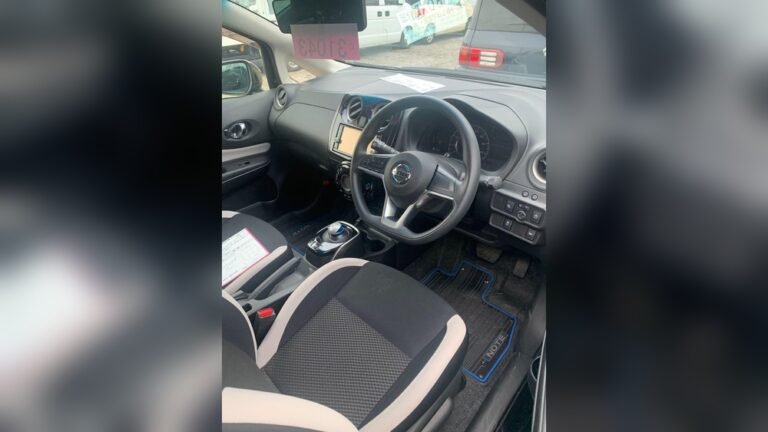
2. Remove The Old Stereo
- Use a trim removal tool to gently take off the dashboard panel.
- Unscrew and slide out the old stereo.
- Unplug all wires. Label them if you want to remember where they go.
3. Prepare The Wiring
You need to connect the car’s wires to the Sanptent wiring harness.
- Match wire colors: Most harnesses use standard colors (e.g., yellow for power, black for ground).
- Use an adapter: A wiring harness adapter makes this step much easier and avoids cutting your car’s original wires.
- Connect wires: You can use crimp connectors or solder and tape the wires.
Common Wire Color Chart
| Sanptent Wire | Car Wire Function |
|---|---|
| Yellow | 12V Constant Power |
| Red | 12V Switched Power |
| Black | Ground |
| Blue | Antenna/Remote |
| White/Gray/Green/Purple pairs | Speakers |
Insight: If your car has steering wheel controls, you may need a special adapter. Not all Sanptent models support this out of the box.
4. Mount The New Stereo
- Insert the Sanptent unit into the dash kit (if needed).
- Secure with screws.
- Plug in all wires and connectors, including antenna and USB cables.
- Test the stereo before putting the dash back.
5. Reassemble The Dashboard
- Carefully snap the trim panel back.
- Check for gaps or loose pieces.
- Reconnect the battery and turn on the car.
Important: Test all functions—radio, Bluetooth, USB, backup camera (if installed). Make sure the sound comes from all speakers.

Credit: www.ebay.com
First-time Setup And Testing
After installation, spend a few minutes setting up your new stereo. Here’s what to do:
- Set the clock and language.
- Pair your phone with Bluetooth.
- Try a music app (like Spotify) to check connectivity.
- Adjust EQ settings for better sound.
If your Sanptent model supports Apple CarPlay or Android Auto, plug in your phone and follow the prompts. If something doesn’t work, double-check your wiring and connections.
Common Problems And How To Fix Them
Even with careful work, some issues can happen. Here are common problems and how to solve them:
- No power: Check the yellow and red wires. Make sure they have voltage.
- Speakers not working: Check the speaker wire pairs. One loose wire can silence a speaker.
- No sound but stereo turns on: Make sure the mute function is off and the speaker wires are correct.
- Backup camera not showing: Check the camera wiring and connect the reverse signal wire.
- Unit does not fit: You may need a different dash kit for your car.
Non-obvious insight: Some cars have factory amplifiers. If your sound is weak or distorted, you may need an amplifier integration harness.

Credit: manuals.plus
Practical Tips For A Smooth Installation
To avoid mistakes and frustration, keep these tips in mind:
- Read the manual: Both your car and the Sanptent stereo manual.
- Label wires: Use masking tape to mark each wire.
- Take photos: Before and after each step.
- Work in daylight: Good lighting helps you see small wires and connectors.
- Test before finishing: Always test the stereo before closing the dash.
Example: Installation Time
Most beginners need 1–2 hours for the full process. If you run into problems, take a break and check an online forum or the Sanptent support site.
Comparing Sanptent Models
Sanptent offers several stereo models. Here’s a quick comparison of popular options:
| Model | Screen Size | Features | Price Range |
|---|---|---|---|
| Sanptent 7″ Double DIN | 7 inch | Bluetooth, USB, CarPlay/Android Auto | $75–$120 |
| Sanptent Single DIN Flip-Out | 7 inch (motorized) | Bluetooth, Touchscreen, SD Card | $90–$140 |
| Sanptent 10.1″ Floating Screen | 10.1 inch | Android OS, WiFi, GPS, Backup Camera | $120–$200 |
Choose a model based on your car’s dash space and the features you want.

Credit: www.amazon.com
Mistakes Beginners Often Make
Many first-time installers repeat the same mistakes. Watch out for these:
- Skipping the battery disconnect: This can damage your car’s electronics.
- Wrong wire connections: Always double-check color codes.
- Forgetting antenna connection: No radio signal if you miss this step.
- Not using a dash kit: Causes loose fit and vibration.
- Not securing wires: Loose wires can cause shorts or noise.
Non-obvious insight: Some cars need a special CAN-BUS adapter for certain features to work. If your car’s lights, steering controls, or warning sounds stop after installation, check if you need this adapter.
When To Get Professional Help
DIY is fun, but sometimes it’s better to call a pro:
- If your car has a factory amplifier or premium sound system.
- If your car uses fiber optic audio (usually in luxury cars).
- If you are not comfortable with wiring.
Professional installation can cost $75–$200, but it saves time and avoids damage.
How To Get The Best Sound Quality
Installing a Sanptent stereo is just the first step. To get the best results:
- Use high-quality speakers if your old ones are worn out.
- Adjust the EQ to match your music style.
- Avoid turning the volume too high; it can distort sound.
- Use good-quality music files or streaming.
Some users add a small amplifier or subwoofer for better bass. Upgrading your speakers later is easy once your new stereo is installed.
Is Sanptent Reliable? Real-world Feedback
Sanptent is not as famous as Pioneer or Sony, but it offers great value. Based on Amazon reviews and online forums:
- Over 80% of buyers say it’s “easy to install.”
- Most units last for years if installed correctly.
- Customer support is responsive for troubleshooting.
However, some users report bugs with Bluetooth or touchscreens. Always update your firmware if a new version is available.
For deeper background, you can check the brand’s reputation on Amazon.
Frequently Asked Questions
How Do I Know If A Sanptent Stereo Will Fit My Car?
Measure your dash opening and check if it is single DIN (2 x 7 inches) or double DIN (4 x 7 inches). Most Sanptent models fit double DIN spaces. If you’re not sure, search online for your car’s stereo size or ask a car audio shop.
Do I Need Special Tools To Install A Sanptent Stereo?
Most jobs use basic tools like screwdrivers, wire cutters, and a panel removal tool. Some cars need a special radio removal key. Having a wiring harness adapter makes installation much easier and safer.
Can I Keep My Steering Wheel Controls With A Sanptent Stereo?
Some Sanptent models support steering wheel control, but you may need a special adapter. Check your stereo’s manual and buy the right adapter for your car model.
Why Does My Sanptent Stereo Have No Sound After Installation?
Check that all speaker wires are connected and not touching each other. Make sure the mute is off and the wiring harness is correct. If your car has a factory amplifier, you may need an extra adapter.
Will Installing A Sanptent Stereo Void My Car’s Warranty?
In most cases, changing the stereo does not void your warranty if installed properly. However, mistakes that damage the electrical system could affect your warranty. If your car is very new, check with your dealer first.
Upgrading to a Sanptent car stereo can truly transform your daily drive, making your car smarter and your music clearer. With a bit of patience and careful work, even beginners can enjoy modern features without spending a fortune on installation. Take your time, follow each step, and enjoy your new sound system.