How to Fix a Blown Speaker in a Car: Step-by-Step Guide
A blown speaker in your car can turn every drive into a frustrating experience. The music sounds distorted, rattling noises take over, or maybe you hear nothing at all from one side. Many drivers think a blown speaker means a costly trip to the mechanic or replacing the entire sound system.
But with the right guidance, some patience, and a few basic tools, you can often fix a blown car speaker yourself. This guide will walk you through everything you need to know, from diagnosing the problem to making effective repairs, helping you save money and restore the joy of clear music during your drive.
What Does A Blown Speaker Sound Like?
Before you grab your toolbox, you need to confirm if your car speaker is truly blown. A blown speaker can sound different depending on the damage. Some common signs are:
- Distorted sound: Music may sound fuzzy or crackly, especially at higher volumes.
- Buzzing or rattling: Even at low volumes, you might hear a rattling noise that wasn’t there before.
- Lack of bass or treble: The audio may seem flat, missing its usual depth.
- No sound at all: Sometimes, a blown speaker just stops working.
A quick tip: play a song you know well at a moderate volume. Listen closely to each speaker. If one sounds off or silent, you’ve likely found the culprit.
Common Causes Of Blown Car Speakers
Understanding why your speaker blew helps you prevent the problem in the future. The most common causes include:
- Playing music too loud: Consistently using high volume can push the speaker cone beyond its limits.
- Sudden audio spikes: Accidental high-pitched sounds or amplifier pops can cause instant damage.
- Old or worn components: Over time, speaker materials like foam and rubber degrade, making them fragile.
- Water damage: Car doors sometimes leak, allowing water to reach the speakers.
- Poor installation: Incorrect wiring or loose mounting can lead to vibration and failure.
Non-obvious insight: Cheap aftermarket speakers can blow more easily than original equipment, especially if the amplifier power doesn’t match the speaker’s rating.
Diagnosing The Problem
Before you start repairs, you need to be sure the speaker is the problem—not the wiring, amplifier, or stereo.
Step 1: Isolate The Faulty Speaker
Turn on your car stereo and fade the sound fully to the left, then to the right. Do the same for the front and back. This helps you find exactly which speaker is blown.
Step 2: Check The Connections
Loose or corroded connections can mimic a blown speaker. Gently wiggle the speaker wires at the back of the stereo and at the speaker itself. If sound comes and goes, you may only need to tighten or clean the connections.
Step 3: Swap Speakers
If you have more than one of the same size speaker, swap the left and right speakers. If the problem moves with the speaker, the speaker is faulty. If it stays in the same position, the wiring or stereo is likely to blame.
Step 4: Use A Multimeter
A multimeter checks the electrical resistance (ohms) of the speaker. A working speaker usually reads between 3 and 8 ohms. If you get an infinite reading or zero, the speaker’s voice coil is likely damaged.
Step 5: Visual Inspection
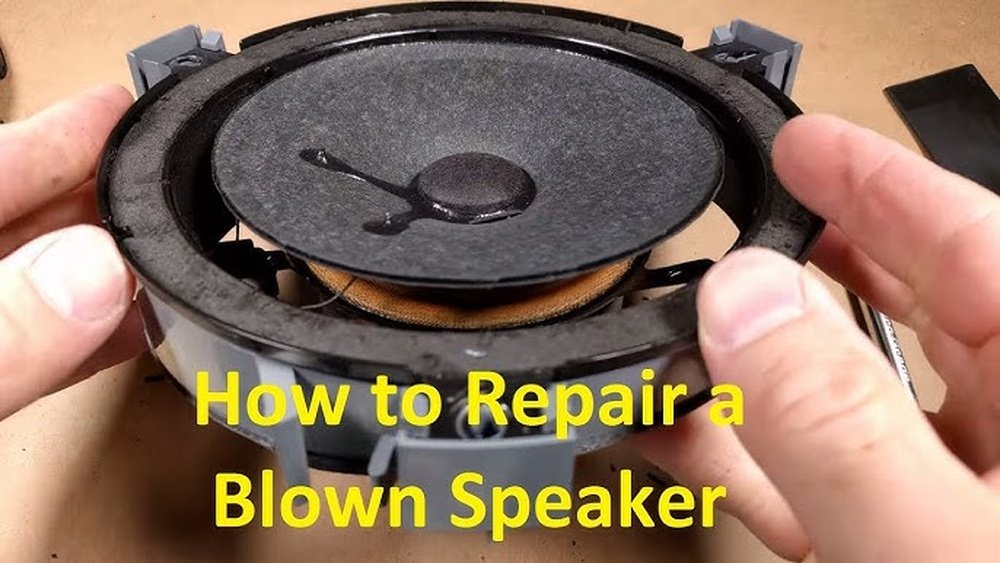
Remove the speaker grill and look for damage. Torn cones, separated surrounds, or burnt smells are all signs of a blown speaker.
Non-obvious insight: Sometimes, a speaker sounds blown due to loose screws or objects in the door panel vibrating against it. Always check for loose items before assuming the speaker is bad.
Tools And Materials You’ll Need
Having the right tools makes the job safer and faster. Here’s what most car speaker repairs require:
- Screwdrivers (Phillips and flathead)
- Panel removal tool or plastic trim tool
- Soldering iron and solder (for wire repairs)
- Electrical tape or heat shrink tubing
- Replacement speaker cone or foam surround (if repairing)
- Multimeter (for testing)
- Utility knife or scissors
- Adhesive (special speaker glue or contact cement)
- Cleaning cloth
- Replacement speaker (if you plan to swap out the old one)
If you’re only fixing a small tear, you may not need all these items.
How To Access Your Car Speaker
Accessing the speaker is often the hardest part due to trim panels and hidden screws. Here’s how to do it step by step:
- Disconnect the car battery: Safety first. This prevents shorts or shocks.
- Remove trim panels: Use a plastic trim tool to gently pry off door panels or dashboard covers. Look for screws hidden under armrests or switches.
- Remove the speaker: Unscrew the speaker from its mount. Carefully disconnect the wires.
- Inspect the space: Check for water, dust, or debris that could have contributed to the damage.
Pro tip: Take photos as you go. This makes reassembly much easier.
Can You Repair A Blown Speaker, Or Should You Replace It?
Whether you should repair or replace depends on the damage. Small tears or foam surround rot can often be fixed. Burnt voice coils or shattered cones usually mean replacement is smarter.
Repairable Damage
- Small tears or holes in the cone
- Foam surround rot
- Loose or broken wires
Non-repairable Damage
- Burned or melted voice coil
- Major cone destruction
- Complete silence with proper wiring

Credit: www.reddit.com
How To Fix A Blown Speaker In A Car
Let’s get practical. Here’s how to fix the most common speaker problems step by step.
Fixing Small Tears Or Holes In The Cone
- Clean the area: Use a dry cloth to wipe away dust.
- Apply adhesive: Use special speaker glue, rubber cement, or even clear nail polish for tiny tears.
- Patch larger holes: Use thin tissue paper or coffee filter cut to size. Apply glue to the paper, then place it over the tear.
- Let it dry: Wait at least 1 hour before reassembling.
This repair restores sound quality for small damages but isn’t perfect for large holes.
Replacing A Foam Surround
If the foam ring around the cone is rotted or broken, you can install a new surround.
- Remove the old foam: Carefully cut away the old foam with a utility knife.
- Clean the surfaces: Remove old glue from the cone and speaker frame.
- Glue the new surround: Apply adhesive to both the cone and frame, then press the new foam in place.
- Let it dry: Wait at least 2 hours, then test the speaker.
This repair often brings old speakers back to life and improves bass response.
Repairing A Loose Or Broken Wire
Loose wires are a simple fix.
- Resolder the connection: Heat the soldering iron and add a small amount of solder to reconnect the wire.
- Secure with tape or tubing: Use electrical tape or heat shrink tubing to protect the wire.
- Test the connection: Before mounting the speaker back, play music to confirm the fix.
Replacing The Speaker
If repair isn’t possible, replacement is the best option. Here’s how:
- Buy the correct size: Match the diameter and impedance (ohms) of your old speaker.
- Install the new speaker: Connect the wires—positive to positive, negative to negative.
- Secure in place: Screw the new speaker into the mount.
- Test before reassembling trim: Play music to ensure everything works.
Non-obvious insight: Many car speakers are part of a matched system. Mismatched replacements can cause uneven sound or even damage your amplifier. Always check the specs.
Comparing Repair Vs. Replacement
Let’s compare the two main options side by side.
| Factor | Repair | Replacement |
|---|---|---|
| Cost | Low (under $20) | Moderate to high ($30–$200+) |
| Time | 1–2 hours | 1–2 hours |
| Required skills | Basic DIY, some patience | Basic DIY, less technical |
| Sound quality | Can be good if damage is minor | Like new or better |
| Longevity | Temporary (may fail again) | Long-term |

Credit: abcadvancedauto.com
Step-by-step: Full Speaker Replacement
If you decide to replace the speaker, here’s a more detailed process.
- Choose the right replacement: Check your car manual or measure the old speaker. Common sizes are 6.5″, 5.25″, or 6×9″.
- Disconnect the battery: Always do this to avoid electric shock.
- Remove the trim and speaker: Use a trim tool and screwdriver.
- Disconnect wires: Note which wire is positive and which is negative.
- Install the new speaker: Plug in the wires and secure the speaker.
- Test the sound: Before putting everything back, play music.
- Reassemble the trim: Carefully snap panels and screws back in place.
Pro tip: If the new speaker doesn’t fit perfectly, use a mounting adapter or bracket.
How To Prevent Future Speaker Damage
Once you’ve fixed or replaced your speaker, you’ll want to keep it working as long as possible. Here’s how:
- Avoid maximum volume: High volume stresses the speaker cone and voice coil.
- Check for water leaks: Make sure the door seals are in good shape.
- Upgrade the amplifier: If you’ve installed more powerful speakers, the old amp may not match.
- Use high-quality music files: Low-quality files can create distortion at normal volumes.
- Secure loose items in doors: Remove coins, pens, or screws that might rattle and damage the speaker.
- Regularly inspect your speakers: Check for early signs of foam rot or loose wires.
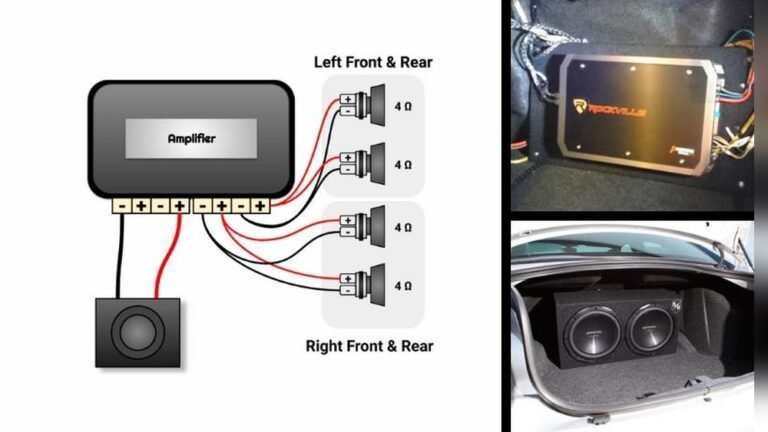
Matching Speaker And Amplifier Power
A common beginner mistake is installing a speaker that can handle more or less power than your amplifier provides. Here’s why it matters:
- Underpowered speakers can distort or blow at low volumes.
- Overpowered speakers may never reach their full potential and sound weak.
Check the RMS power rating of both the speaker and amplifier. The ratings should be within 10-20% of each other.
Cost Breakdown: Diy Vs. Professional Repair
You might wonder if fixing a blown speaker yourself is really worth it. Here’s a cost comparison.
| Option | Average Cost | What’s Included |
|---|---|---|
| DIY Repair | $10–$40 | Parts, glue, tools (if you have them) |
| DIY Replacement | $30–$200+ | New speaker(s), tools |
| Professional Repair | $50–$150 per speaker | Labor, parts, installation |
| Professional Replacement | $100–$300 per speaker | Speaker, labor, warranty |
Non-obvious insight: DIY is much cheaper, but professionals offer guarantees. If your car is under warranty, professional repair may keep your warranty valid.
Real-life Example: Common Car Speaker Fixes
Let’s look at a quick real-world example.
Situation: A 2014 Honda Accord’s front driver-side speaker sounds distorted and rattles at medium volume.
Diagnosis: The car owner removes the door panel and finds the foam surround crumbling. The speaker cone is intact.
Solution: The owner buys a foam surround repair kit for $15, cleans off the old foam, glues the new surround, and lets it dry overnight. The speaker now works perfectly, and the fix took about 90 minutes.
This is a typical scenario—many blown speakers only need a simple foam repair.
When To Seek Professional Help
Not all problems are DIY-friendly. Consider calling a professional if:
- You hear electrical burning smells
- There’s no sound from multiple speakers
- The car has a complex sound system with amplifiers and subwoofers
- You’re not comfortable removing trim panels or soldering
Professional installers have the tools and experience to avoid causing more damage.
Environmental Impact Of Speaker Repair Vs. Replacement
Fixing your speaker instead of replacing it can reduce electronic waste. Millions of car speakers end up in landfills each year. By repairing, you help the environment and save money. If you must replace, recycle your old speaker at an electronics recycling center.
Speaker Brands And Quality Differences
Not all speakers are created equal. Some brands use better materials and last longer.
| Brand | Average Lifespan | Notes |
|---|---|---|
| JBL | 8–10 years | Durable, good sound quality |
| Pioneer | 7–10 years | Reliable, wide range of models |
| Alpine | 8–12 years | Premium build, slightly higher price |
| No-name/Generic | 2–5 years | Low cost, shorter lifespan |
Non-obvious insight: Sometimes, factory speakers are custom-shaped for your car. Replacing them with aftermarket brands may require special adapters or cutting.

Credit: www.youtube.com
Tips For Better Car Audio After Repair
After fixing your speaker, you might want even better sound. Here’s how:
- Add sound-deadening material: Line your car door with special foam or mats to reduce vibrations and improve clarity.
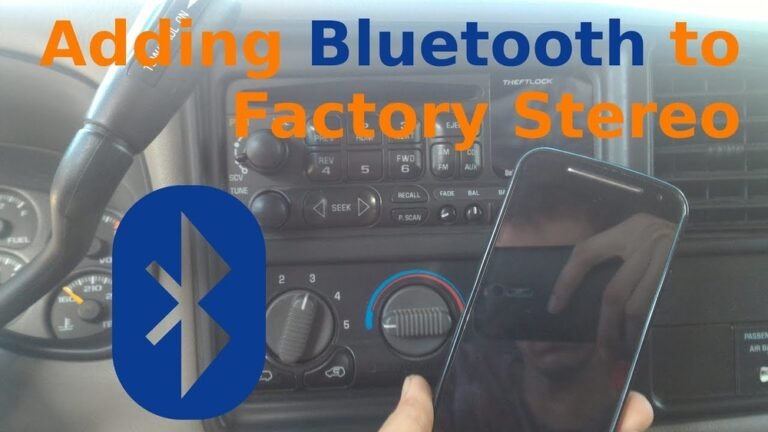
- Upgrade the head unit: A new stereo can provide cleaner power and features like Bluetooth.
- Tune the equalizer: Adjust the bass, mid, and treble settings for your new or repaired speakers.
- Check the balance and fade: Make sure the sound is even across all speakers.
- Use high-quality audio cables: Old or corroded cables can cause noise and distortion.
Frequently Asked Questions
How Do I Know If My Car Speaker Is Blown?
A blown speaker often sounds distorted, rattles, or is silent. You can test by playing music and listening closely to each speaker. If one doesn’t match the others, it’s likely blown. A multimeter test (checking for proper ohm reading) confirms the diagnosis.
Can A Blown Speaker Damage My Car Stereo?
A single blown speaker usually won’t hurt your stereo, but it can stress the amplifier if it creates a short circuit. If you hear crackling or popping from multiple speakers, stop using the system and check for wiring issues.
Is It Worth Repairing A Car Speaker, Or Should I Always Replace It?
If the damage is minor, like a small tear or foam rot, repair is cheap and effective. For major issues like a burned voice coil or a broken cone, replacement is better. Consider speaker age and your car’s value.
What Type Of Glue Should I Use To Fix Speaker Cones?
Special speaker repair glue is best, but rubber cement, clear nail polish (for tiny cracks), or contact cement can also work. Always use a flexible adhesive—never superglue, as it dries too hard and can crack.
Where Can I Recycle Old Car Speakers?
Most electronics recycling centers accept speakers. Some car audio shops also offer recycling. For more information, check resources like the EPA’s recycling page.
Restoring your car’s sound doesn’t have to be complicated or expensive. With careful diagnosis, the right tools, and a patient approach, you can fix a blown car speaker and enjoy your favorite music on the road again.