How to Install an Android Car Stereo: Step-by-Step Guide
Installing an Android car stereo can completely change your driving experience. With one device, you can stream music, use navigation, make hands-free calls, and even mirror your smartphone’s display. But if you’ve never done it before, replacing your factory radio with an Android head unit can feel intimidating. The good news: you don’t need to be a professional mechanic or electronics expert to get the job done. With the right tools, a clear plan, and some patience, you can install your new stereo at home and avoid paying expensive shop fees.
This guide explains everything you need to know, from choosing the right stereo, gathering tools, and safely removing your old unit, to wiring, mounting, and testing your new Android car stereo. Whether you’re upgrading to enjoy Android Auto, Bluetooth streaming, or better sound, you’ll find step-by-step instructions, practical tips, and troubleshooting advice below. Let’s get started and bring your car’s audio system into the modern era.
Understanding Android Car Stereos
Before you begin, it’s important to understand what an Android car stereo is. Unlike basic factory radios, Android head units are advanced multimedia devices running the Android operating system. They offer features like:
- Touchscreen interfaces
- Support for apps (Spotify, Google Maps, etc.)
- Bluetooth hands-free calling and audio
- Wi-Fi and internet connectivity
- Steering wheel control compatibility
- USB and SD card ports
Most importantly, you’re getting a platform you can customize with your favorite apps and settings. But not all Android car stereos are the same. They differ in screen size, hardware (processor, RAM), compatibility, and expandability. Choosing the right one is the first step.
What You Need Before Installation
Preparation makes everything smoother. Here’s a checklist of what you’ll need:
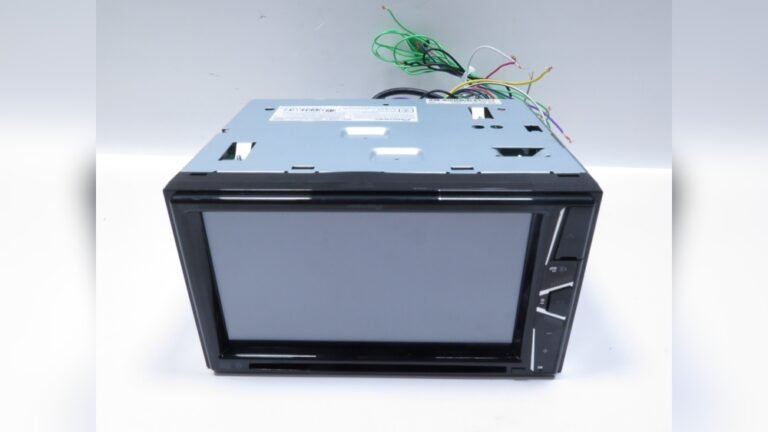
- Android car stereo unit: Make sure it fits your vehicle’s dashboard (single-DIN or double-DIN).
- Wiring harness adapter: This connects the new stereo to your car’s wiring without cutting factory wires.
- Dash kit: Ensures the new stereo fits snugly in your dashboard.
- Antenna adapter: Lets you connect your car’s radio antenna to the new unit.
- Basic tools: Screwdrivers (Phillips and flat-head), wire strippers, electrical tape, panel removal tools, and crimp connectors.
- Multimeter: For testing power and ground wires.
- Zip ties: For organizing wires.
- User manuals: For both your car and the Android stereo.
Pro tip: Double-check compatibility using your car’s make, model, and year. Some vehicles require special adapters for steering wheel controls or backup cameras.
Step 1: Choosing The Right Android Car Stereo
Selecting the correct head unit is crucial for both performance and fit. Consider the following:
Size And Fit
Most cars support either:
- Single-DIN (2 inches tall)
- Double-DIN (4 inches tall, fits large touchscreens)
Check your car’s radio slot. If unsure, measure the opening or consult your car’s manual.
Features To Consider
- Screen size and resolution: Larger screens are easier to use, but must fit your dash.
- Operating system version: Newer versions offer better app support and security.
- Processor and RAM: Faster units run smoother, especially with multiple apps.
- Connectivity: Look for Bluetooth, Wi-Fi, GPS, and USB options.
- Audio output quality: Check the RMS wattage and equalizer features.
Compatibility
Some cars with advanced electronics need special interfaces. For example, vehicles with factory amplifiers, backup cameras, or steering wheel controls may need additional adapters.
Example Comparison
Here’s a simple comparison of two popular Android head units:
| Feature | Unit A (Single-DIN) | Unit B (Double-DIN) |
|---|---|---|
| Screen Size | 7 inches (flip-out) | 10.1 inches |
| RAM | 2 GB | 4 GB |
| Bluetooth | Yes | Yes |
| GPS | Built-in | Built-in |
| Steering Wheel Control | Adapter required | Built-in support |
Non-obvious tip: Some cheaper Android head units run unofficial or outdated Android versions, which can affect app compatibility and security. Always check the product specs and user reviews before buying.
Step 2: Gather Tools And Accessories
Having all your tools ready saves a lot of time and stress. Here’s a more detailed look at what you’ll use:
- Panel removal tools: Made of plastic, these prevent damage to your dashboard.
- Soldering iron (optional): For the most secure wire connections.
- Crimp connectors: Faster than soldering, and good for beginners.
- Electrical tape or heat shrink tubing: To insulate wire connections.
- Multimeter: For verifying power and ground.
- Flashlight: Car interiors can be dark, especially under the dash.
Beginner mistake: Using metal tools to pry panels can scratch or crack your dash. Always use plastic trim tools.

Credit: www.amazon.com
Step 3: Disconnect The Car Battery
Safety always comes first. Before you touch any wires, disconnect the negative (-) terminal of your car’s battery. This prevents short circuits and accidental airbag deployment.
- Use a wrench to loosen the nut.
- Remove the cable and tuck it away so it doesn’t touch the battery.
- Wait at least 10 minutes before working near airbags or sensitive electronics.
Practical insight: Many cars store radio and clock settings in memory. Be prepared to reset them after installation.
Step 4: Remove The Factory Stereo
Every car is a little different, but the basic process is similar:
- Remove trim panels: Use your panel tools to carefully pop off any plastic trim around the radio.
- Unscrew mounting bolts: Most radios are held by 2-4 screws.
- Slide out the factory stereo: Gently pull it forward. Don’t yank—wires are still attached.
- Disconnect wiring harness and antenna: Squeeze the tabs and unplug everything.
Extra tip: Take a photo of the wiring before disconnecting. This can help if you need to double-check connections later.
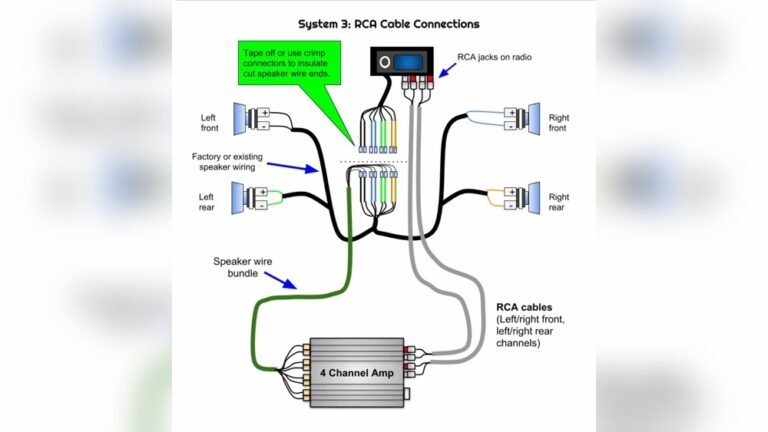
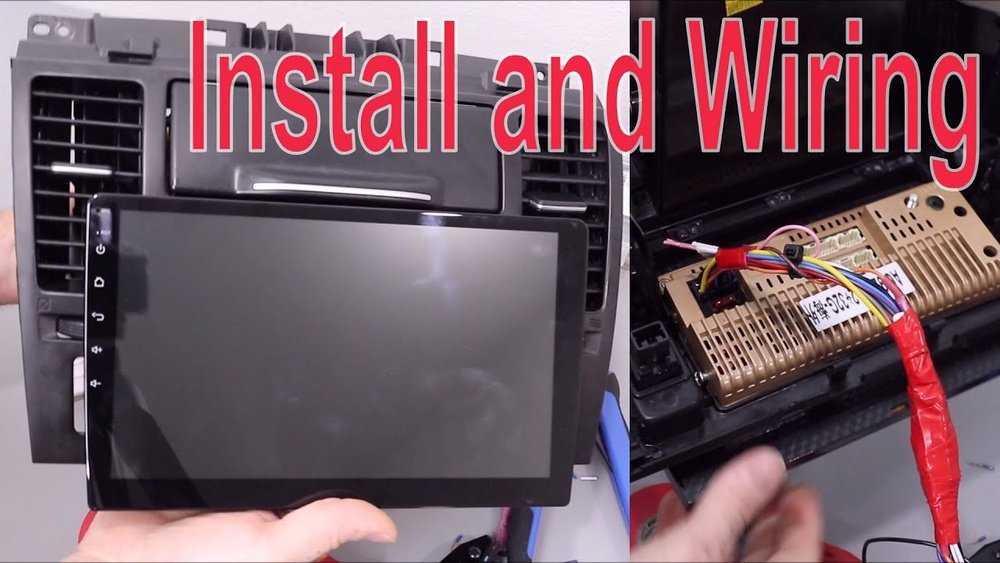
Step 5: Connect The Wiring Harness
This is often the most confusing part for beginners, but it’s essential for a safe and reliable installation.
Wiring Color Codes
Most wiring harnesses use standard colors:
- Yellow: 12V constant (battery)
- Red: 12V switched (ignition)
- Black: Ground
- Blue: Power antenna/amp turn-on
- Orange: Illumination/dimmer
- White/White-black: Front left speaker (+/-)
- Gray/Gray-black: Front right speaker (+/-)
- Green/Green-black: Rear left speaker (+/-)
- Purple/Purple-black: Rear right speaker (+/-)
Always verify with your car’s wiring diagram and the stereo manual.
Steps To Connect
- Match wires by color from the stereo harness to the adapter harness.
- Strip 1/4 inch of insulation from each wire.
- Twist and crimp or solder each pair of wires.
- Insulate each connection with tape or heat shrink tubing.
- Double-check all connections before plugging in.
Pro insight: Use a multimeter to verify the ground and power wires before connecting. Some cars have non-standard color codes.
Step 6: Prepare The Dash Kit And Mounting Brackets
Most aftermarket stereos need a dash kit to fit snugly in your car. Here’s how to set it up:
- Assemble the dash kit according to its instructions.
- Attach any brackets or side plates.
- Slide the stereo into the kit and secure it with screws.
Pro tip: Test-fit the assembly in your dash before connecting the wires. This avoids surprises later.
Step 7: Connect The New Stereo
Now it’s time to install your Android unit:
- Plug the wiring harness adapter into your car’s factory harness.
- Connect the antenna adapter.
- Attach any extra adapters (steering wheel controls, USB, or camera cables).
- Slide the stereo into the dash but don’t secure it fully yet.
Beginner mistake: Forgetting to connect the radio antenna leads to poor radio reception.
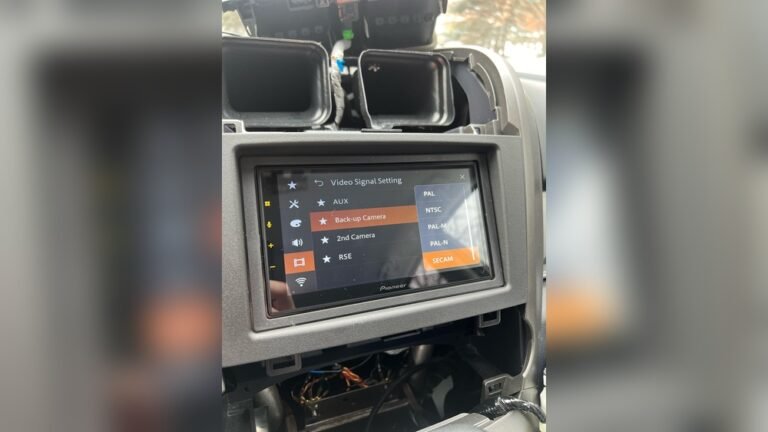
Step 8: Test The System Before Final Assembly
Before finishing the installation, test everything:
- Reconnect the car battery temporarily.
- Turn on the ignition and power up the stereo.
- Check for:
- Startup and touchscreen response
- Sound from all speakers
- Bluetooth pairing
- Radio function
- Camera input (if installed)
- Steering wheel control (if connected)
- Turn off the car and disconnect the battery again before final assembly.
Non-obvious tip: Test AM and FM radio separately. Some antenna adapters support only FM, not AM.
Step 9: Secure The Stereo And Reassemble The Dash
After confirming everything works:
- Slide the stereo fully into the dash.
- Secure with mounting screws.
- Snap the trim panels back in place.
- Reconnect the battery.
Pro tip: Use zip ties to bundle wires and keep things tidy behind the dash. This prevents rattles and makes future upgrades easier.
Step 10: Final Setup And Customization
With your new Android car stereo installed, take some time to customize it:
- Set the language, time, and date.
- Connect your Google account for Play Store access.
- Download essential apps (music, maps, podcasts).
- Adjust the audio equalizer for the best sound.
- Set up Bluetooth devices (phones, tablets).
- Configure Wi-Fi or mobile hotspot (if supported).
- Program steering wheel controls (if needed).
Extra insight: Many Android head units support firmware updates. Check the manufacturer’s website for the latest software to improve features and security.

Credit: www.youtube.com
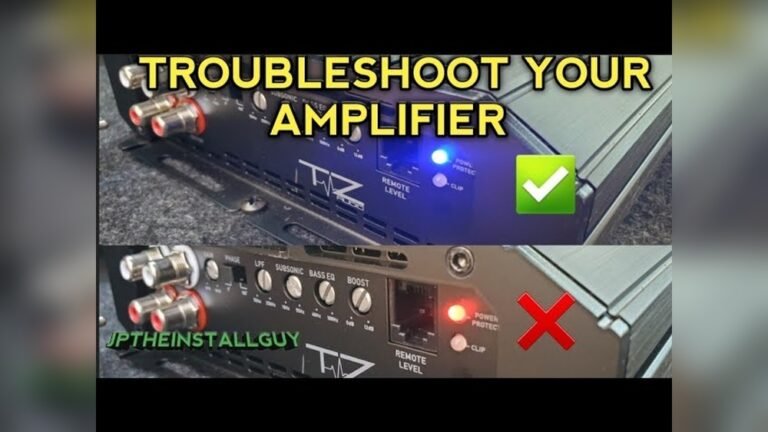
Common Problems And Troubleshooting
Even experienced installers run into problems. Here’s how to solve the most common issues:
No Power
- Check the fuse in the stereo’s wiring harness.
- Verify the yellow and red wires are connected to 12V sources.
- Test with a multimeter.
No Sound
- Double-check speaker wire connections.
- Some cars use factory amplifiers; you may need an additional adapter.
Poor Radio Reception
- Make sure the antenna adapter is connected.
- Some head units need a powered antenna adapter.
Touchscreen Not Responding
- Check for loose connections.
- Make sure the stereo is securely mounted (some units ground through the chassis).
Backup Camera Not Working
- Test the camera with another screen.
- Verify the camera wiring and power source.
Non-obvious insight: Many Android stereos have a small reset button. If something stops working after setup, a reset can fix software glitches.
Comparing Diy Vs. Professional Installation
Is it worth installing your stereo yourself, or should you pay a shop to do it? Here’s a quick comparison:
| Factor | DIY Installation | Professional Installation |
|---|---|---|
| Cost | $0 (if you have tools) | $100–$300+ |
| Time | 2–4 hours (first time) | 1–2 hours |
| Learning Experience | High | Low |
| Warranty | Usually not included | Often included |
| Tools Needed | Yes | No |
If you value learning and saving money, DIY is a great option. If you lack tools or time, a pro installer can be worth the cost.

Credit: www.amazon.com
Safety And Legal Considerations
- Don’t watch videos or input navigation while driving.
- Some features (like video playback) may be restricted by local laws.
- Always secure all wires and connections to prevent shorts or fire risk.
- If your car uses advanced safety features (like airbags or CAN bus systems), consult a professional.
Important: Improper installation can affect other electronics in your car. If you’re unsure at any step, ask for help or hire a qualified installer.
Tips For A Successful Installation
- Read both manuals (car and stereo) before starting.
- Label all wires as you disconnect them.
- Keep screws and parts organized in small cups or bags.
- Take photos during each step for reference.
- Never force connectors—if something doesn’t fit, double-check compatibility.
- Use proper insulation on all wiring.
- Plan for future upgrades (leave enough slack in wires).
- Check for firmware updates after installation.
- Test everything before reassembling the dash.
- Stay patient—rushing leads to mistakes.
Should You Upgrade Your Speakers Too?
Many factory speakers are low quality. If you’re installing a powerful new Android stereo, consider upgrading your speakers for even better sound. You don’t have to do this immediately, but it’s easier if you already have the dash apart.
Example: Upgrading from factory paper speakers to quality aftermarket units can boost sound clarity, bass, and volume by 30–50%.
How Long Does Installation Take?
For beginners, a full install usually takes 2 to 4 hours. If your car is newer or uses a factory amplifier, it may take longer. Plan your schedule so you don’t have to rush.
Android Car Stereo Installation: Quick Overview
To recap, here’s a high-level summary of the installation process:
- Gather all tools and parts.
- Disconnect the car battery.
- Remove the factory radio.
- Connect the wiring harness.
- Prepare the dash kit and brackets.
- Plug in the new stereo and test.
- Secure everything and reassemble the dash.
- Set up and customize your new Android system.
If you take your time and double-check each step, you’ll end up with a professional-looking result and a much more enjoyable driving experience.
Where To Find Reliable Help And Resources
If you get stuck, check out online forums and video tutorials. Sites like Crutchfield have excellent guides and vehicle-specific instructions. Always look for advice that matches your car’s exact year and model.
Frequently Asked Questions
How Do I Know If An Android Car Stereo Will Fit My Car?
Measure your current radio slot or check your car’s manual for DIN size (single or double). Many online retailers let you enter your car’s make, model, and year to find compatible options.
Do I Need To Cut Any Wires During Installation?
In most cases, no. Use a wiring harness adapter for your car. This avoids cutting factory wires and makes it easy to return to your original stereo if needed.
Will I Lose Steering Wheel Controls Or Backup Camera Features?
Not if you use the right adapters. Many Android head units support steering wheel controls and backup cameras, but you may need extra modules or interfaces.
Is It Safe To Install A Stereo Myself?
Yes, if you follow instructions, disconnect the battery, and double-check all connections. If your car has advanced electronics or airbags near the radio, consider professional help.
Can I Use Apple Carplay With An Android Car Stereo?
Some Android head units also support Apple CarPlay, but not all. Check the product’s specs. There are also USB dongles that add CarPlay support to certain Android units.
Installing an Android car stereo is one of the best upgrades you can make to your vehicle. With the right preparation, tools, and patience, you’ll enjoy a smarter, more connected driving experience for years to come.