How to Fix Reverse Camera in Car: Easy Troubleshooting Guide
If your car’s reverse camera suddenly stops working, it can be frustrating and even dangerous. The camera helps you see blind spots behind your vehicle, making parking and reversing safer. Fixing a broken reverse camera is possible for most beginners, but you need the right approach. This guide will show you step-by-step how to diagnose and fix common issues, explain tools you need, and offer practical advice. By the end, you’ll be ready to tackle reverse camera problems with confidence—even if you’re not a car expert.
Understanding How Reverse Cameras Work
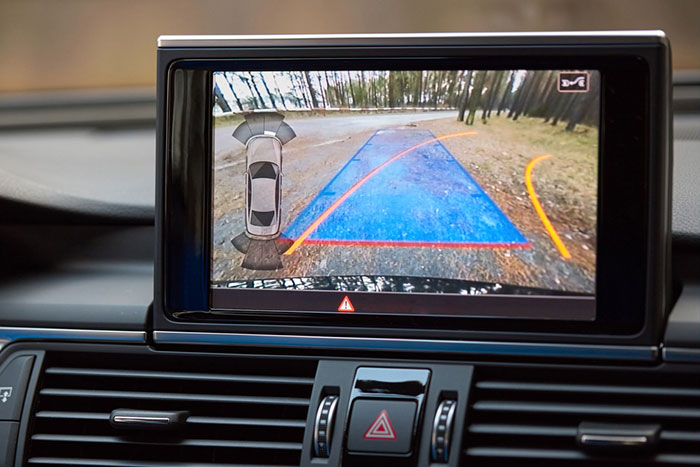
Reverse cameras are usually installed above the license plate or in the rear bumper. They connect to your car’s display screen, showing a live video when you shift into reverse gear. The system includes three main parts:
- Camera unit
- Wiring harness
- Display screen (dashboard or rearview mirror)
When you shift to reverse, the camera sends a signal to the display. Problems can happen if any part stops working. Knowing these basics helps you troubleshoot faster.
Types Of Reverse Cameras
Reverse cameras come in several types. Here’s a simple comparison:
| Type | Installation | Common Issues |
|---|---|---|
| Factory-installed | Integrated during car assembly | Wiring faults, camera failure |
| Aftermarket wired | Added later, wires run through car | Poor connections, water damage |
| Wireless | No wires; uses radio signal | Signal interference, battery issues |
Each type has unique troubleshooting steps, but most fixes are similar.
Common Problems With Reverse Cameras
Before fixing, you need to find out what’s wrong. Here are the most frequent issues beginners face:
- No image on screen
- Fuzzy or blurry picture
- Black screen or “no signal” error
- Camera works sometimes, not always
- Lines or static in the picture
Most problems are caused by:
- Loose wiring
- Blown fuse
- Dirty camera lens
- Faulty camera
- Bad connections
Credit: safetydave.com.au
Diagnosing The Issue
Start with simple checks. Many problems are easy to spot if you know where to look.
Visual Inspection
- Check the camera for dirt, water, or physical damage.
- Make sure the camera is secure and not hanging loose.
- Inspect the wires near the camera and the display for cuts or wear.
Testing The Display
- Shift into reverse and see if the screen changes.
- Try adjusting the brightness or settings.
- If you see a black screen, check if other functions (radio, navigation) work.
Checking The Fuse
Reverse cameras often have a dedicated fuse. Here’s how to check:
- Find your car’s fuse box—usually under the dashboard or in the engine bay.
- Use the owner’s manual to find the reverse camera fuse.
- Remove the fuse and check if it’s blown (the metal strip inside will be broken).
- Replace with a new fuse of the same amperage.
Fuse ratings for reverse cameras are typically 5–10 amps. Always use the correct rating.
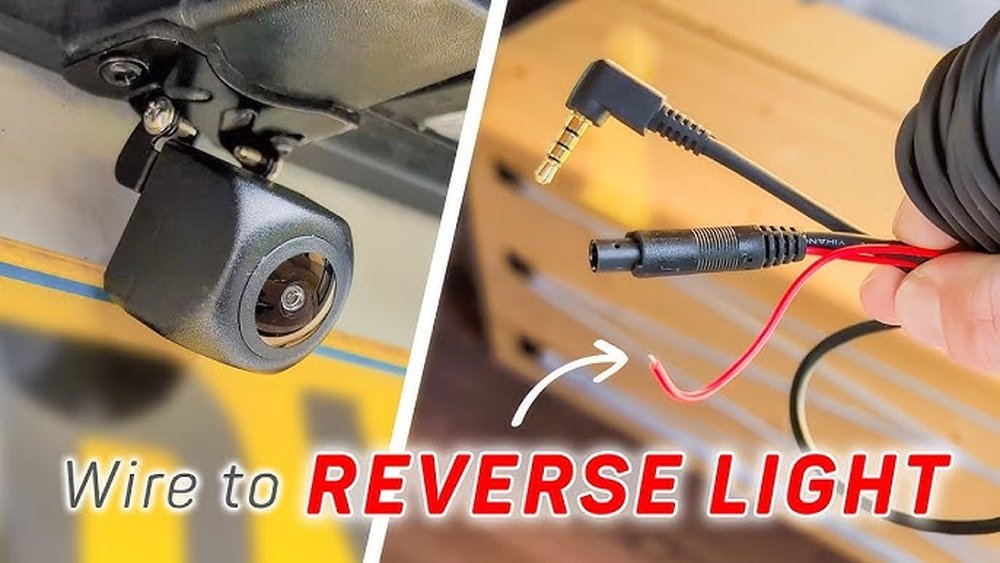
Wiring And Connection Test
Loose or damaged wires cause most camera failures. Look for:
- Disconnected plugs
- Corroded connectors
- Broken wires
If you find damage, repair or replace wires. Beginners often miss hidden connectors under the trunk lining or near the tailgate.
Camera Lens Check
Dirty or foggy lenses create blurry pictures. Clean the lens with a soft cloth and lens cleaner. Avoid harsh chemicals.
Step-by-step Fixes For Beginners
Follow these steps to fix common reverse camera problems. Most repairs require basic tools:
- Screwdriver
- Multimeter (for testing voltage)
- Electrical tape
- Fuse puller
1. Clean The Camera Lens
- Use a microfiber cloth and gentle cleaner.
- Avoid touching the lens with dirty hands.
- If moisture is inside, let it dry or replace the camera.
2. Check And Replace Fuse
- Locate the fuse box.
- Identify the reverse camera fuse.
- Use a fuse puller to remove it.
- Replace if blown.
3. Tighten Or Repair Wiring
- Inspect wires from the camera to the display.
- Re-seat all plugs, especially near the camera.
- Use electrical tape to fix minor damage.
- Replace broken wires if needed.
4. Reset The System
Some cars have a reset option for the camera system.
- Turn off the car, wait a few minutes, then restart.
- Disconnect the battery for 5–10 minutes for a full reset (only if you know how).
5. Replace The Camera
If the camera is physically damaged or won’t work after other fixes:
- Remove the old camera (usually a few screws).
- Plug in and mount the new camera.
- Test before finishing installation.
6. Fix Wireless Camera Issues
If you have a wireless camera:
- Change the batteries in the camera and receiver.
- Check for Wi-Fi or radio interference.
- Move the receiver closer to the camera.

Credit: www.youtube.com
Examples And Practical Data
Let’s look at how these steps work in real life:
- Example 1: Sarah’s Honda CR-V had a black screen. She found a blown fuse and replaced it. The camera worked immediately.
- Example 2: John’s Toyota Camry camera was blurry. Cleaning the lens fixed it—he didn’t need a new camera.
- Example 3: Maria’s Ford F-150 camera stopped working after a rainstorm. She found water damage on the wiring near the tailgate. Repairing the wires restored the image.
According to a 2023 survey by AAA, over 35% of reverse camera failures are caused by wiring problems, while 25% are due to blown fuses. Only 15% require full camera replacement.
Tools And Materials Needed
You don’t need expensive tools. Here’s a helpful comparison:
| Tool | Purpose | Beginner Friendly? |
|---|---|---|
| Screwdriver | Remove camera, open fuse box | Yes |
| Multimeter | Test voltage, check connections | Yes (with simple settings) |
| Fuse puller | Remove fuse safely | Yes |
| Electrical tape | Fix minor wire damage | Yes |
| Replacement camera | Swap broken unit | Yes (plug-and-play models) |
Safety Tips For Diy Repairs
Safety is important when working with car electronics. Follow these tips:
- Turn off the car and remove the key before starting.
- Disconnect the battery if you’re working with wiring.
- Use gloves to protect your hands.
- Don’t force connectors; gentle pressure is best.
- If unsure, ask a mechanic or check the manual.
When To Call A Professional
Some problems need expert help. Call a professional if:
- You see burnt wires or strong smells.
- The camera system is integrated with advanced electronics (like lane assist).
- You’re not comfortable with electrical work.
- Repairs don’t fix the problem.
A certified mechanic can diagnose deeper issues, such as failing display screens or broken control modules.

Credit: www.wikihow.com
Preventing Future Reverse Camera Problems
You can prevent many issues before they happen:
- Clean the camera lens regularly.
- Check wiring for wear every few months.
- Don’t slam the trunk or tailgate—this can loosen wires.
- Avoid high-pressure water near the camera.
- Replace fuses with the correct rating.
Non-obvious tip: Use a silicone sealant around the camera base to block water leaks. Few beginners know this, but it protects wiring from moisture.
Cost And Value Of Repairs
Fixing a reverse camera is usually affordable. Here’s a breakdown:
- Fuse replacement: $5–$10
- Cleaning lens: Free
- Wiring repair: $20–$50 (DIY)
- New camera: $40–$150 (aftermarket)
- Professional service: $100–$300
Doing it yourself saves money, but always balance cost with safety.
Reverse Camera Troubleshooting Checklist
For quick reference, use this troubleshooting checklist:
- Clean camera lens
- Inspect wiring for damage
- Check and replace fuse
- Test display screen
- Reset camera system
- Replace camera if needed
- Call a professional if unsure
Frequently Asked Questions
What Causes Reverse Camera To Stop Working Suddenly?
Sudden failure is usually from a blown fuse, loose wiring, or water damage. Sometimes, the camera itself fails. Check each part to find the real cause.
Can I Fix My Reverse Camera Without Special Tools?
Yes. Most repairs need only a screwdriver, electrical tape, and possibly a fuse puller. Advanced tools like multimeters help, but aren’t required for simple fixes.
Is It Safe To Fix The Reverse Camera Myself?
For basic issues like cleaning the lens or changing a fuse, it’s safe. Always turn off the car and disconnect the battery if working with wiring. If you see burnt wires, call a professional.
How Much Does It Cost To Repair A Reverse Camera?
DIY repairs cost between $5 and $50. Replacing the camera is about $40–$150. Professional service can cost $100–$300. Factory systems are often more expensive.
Where Can I Find More Information About Car Electronics?
Visit Wikipedia for detailed information about backup cameras and car electronics.
Fixing a reverse camera in your car is possible for most beginners. With careful checks, basic tools, and the right approach, you can solve most problems yourself. Regular maintenance and cleaning can prevent future issues, saving time and money. If you ever feel unsure, a professional mechanic is always an option.
Your car’s safety features are important—keep your reverse camera working for safer driving every day.