How to Identify Positive And Negative Speaker Wires in Car Easily
Identifying positive and negative speaker wires in a car can feel confusing, especially if you’re new to car audio. Many people have faced this problem while upgrading speakers, installing new audio equipment, or simply fixing a sound issue. Getting it wrong can lead to poor sound quality, speaker damage, or even a failed installation.
The good news is, you don’t need to be a professional to figure this out. With some basic knowledge, a few simple tools, and careful observation, you can confidently identify your car’s speaker wires and connect them correctly.
This guide will walk you through everything you need to know about finding positive and negative speaker wires in cars. You’ll learn about wire color codes, physical markings, electrical testing, and common mistakes to avoid. You’ll also discover insights most beginners miss, such as the impact of reversed polarity and why some cars don’t follow standard color codes.
By the end, you’ll feel ready to tackle any car audio wiring project without second-guessing your connections.
Why Identifying Speaker Polarity Matters
Before diving into methods, it’s important to understand speaker polarity and why it’s a big deal in car audio. Speaker wires have two sides: positive (+) and negative (–). When you connect speakers with the correct polarity, they move in sync with the audio signal, creating clear, full sound. If you reverse the wires—connecting positive to negative and vice versa—the speakers will move out of phase. This causes weak bass, poor soundstage, and sometimes a “hollow” or “tinny” audio experience.
Reversed polarity won’t usually damage your speakers, but it will definitely hurt your listening experience. In complex systems with multiple speakers, even one pair wired backwards can throw off the whole system. That’s why taking the time to identify positive and negative wires correctly is so important.
Common Car Speaker Wire Color Codes
Many car manufacturers use standard wire color codes to help identify speaker polarity. However, there is no universal color code—different brands and models may use their own schemes. Here are some common patterns:
| Car Brand | Positive Wire Color | Negative Wire Color |
|---|---|---|
| Ford | White or Purple (+ stripe) | White/Black or Purple/Black |
| Honda | Solid color (e.g., Blue, Red) | Color with stripe (e.g., Blue/Black, Red/Black) |
| Toyota | Pink or Light Green | Purple or Gray |
| GM (Chevrolet, GMC) | Tan, Light Green | Gray, Dark Green |
| Nissan | Gray, White | Gray/Black, White/Black |
In most cases, the positive wire is a solid color or has a lighter color, while the negative wire has a stripe or is darker. But this is not guaranteed. Always check a wiring diagram for your specific car model if possible.
Non-standard Color Codes
Some cars use non-standard colors or even the same color for both wires, especially in older vehicles or aftermarket installations. This is where visual and physical inspection becomes essential.
Physical Wire Markings And Clues
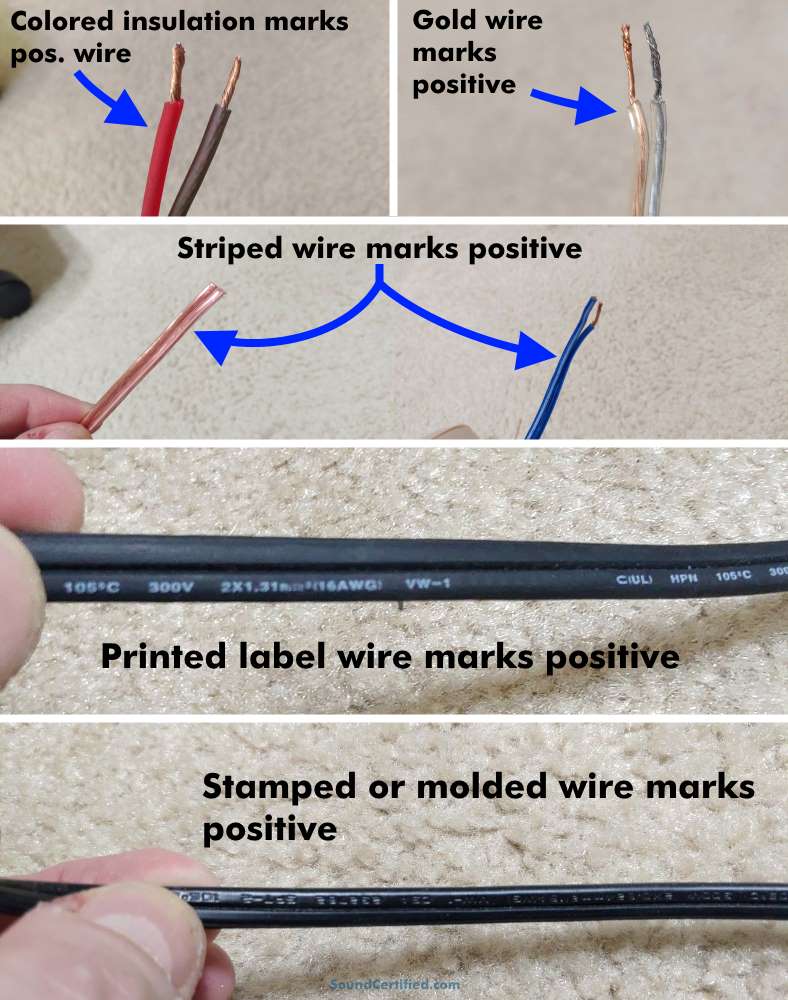
Even if you can’t rely on color, many speaker wires come with physical markings to help you tell them apart.
Stripes And Ridges
- Stripe: One wire may have a painted or printed stripe (often black or white). This is usually the negative wire.
- Ridges: Some wire pairs have a smooth and a ribbed or grooved side. The ribbed wire is typically negative, but always check the package or manufacturer’s specs.
Text And Symbols
Look closely at the insulation. Some wires have tiny text, dashes, or plus/minus symbols molded into the plastic. The side with a “+” is positive, and “–” is negative.
Connector Clues
If the wires are attached to a speaker terminal, the larger terminal is usually negative, and the smaller is positive. Sometimes, the positive terminal is marked with a red dot or a “+” symbol.
Unusual Cases
Aftermarket speakers or wiring kits may use transparent insulation, making it easier to see the copper. In these cases, the tinned (silver) wire is usually negative, and the bare copper is positive.
Using A Multimeter To Identify Polarity
If color codes and markings aren’t clear, a multimeter is a reliable way to identify speaker wire polarity. This method is especially useful if wires have been replaced, spliced, or faded over time.
Steps To Test With A Multimeter
- Set the Multimeter to DC voltage (V—).
- Disconnect the Speaker from the head unit or amplifier.
- Touch the Multimeter Probes to each wire.
- Play a Test Tone or a short burst of audio (optional but helps with accuracy).
- Watch the Reading:
- If the display jumps positive (e.g., +0.5V), the red probe is on the positive wire.
- If it’s negative (e.g., –0.5V), swap the probes to confirm.
A common mistake is testing with the multimeter set to AC voltage; this will not give accurate polarity readings for speaker wires.
Speaker “pop” Test
If you don’t have a multimeter, you can use a 1.5V AA battery for a quick test:
- Disconnect the speaker from the car.
- Touch one wire to the battery’s positive (+) end and the other to negative (–).
- Watch the speaker cone:
- If it moves outward, the wire on the battery’s positive is the speaker’s positive wire.
- If it moves inward, switch the wires.
This method is safe for most speakers if you use a small battery and touch only briefly. Do not use higher voltages.
Identifying Speaker Wires At The Head Unit
Most car audio systems have a head unit (stereo) with a wiring harness that includes speaker wires. If you’re installing a new stereo, you’ll need to match these wires.
Factory Harness Vs. Aftermarket Harness
- Factory Harness: Usually follows the manufacturer’s color codes. Check your owner’s manual or search for a wiring diagram online.
- Aftermarket Harness: Often uses the following industry standard:
- White: Front Left (+)
- White/Black: Front Left (–)
- Gray: Front Right (+)
- Gray/Black: Front Right (–)
- Green: Rear Left (+)
- Green/Black: Rear Left (–)
- Purple: Rear Right (+)
- Purple/Black: Rear Right (–)
When Color Codes Don’t Match
If the wire colors from your car don’t match the new stereo harness, you’ll need to trace the wires physically or use a continuity test (with your multimeter) to confirm which wire goes to which speaker terminal.
Identifying Speaker Wires At The Speaker Location
Sometimes, you need to check wires at the speaker itself, especially if you’re replacing door speakers or repairing connections. Here’s how:
Visual Inspection
- Remove the speaker grille or panel.
- Find the two wires connected to the speaker terminals.
- Look for color codes, stripes, or markings as described earlier.
Terminal Size
Most speakers use a larger terminal for negative and a smaller terminal for positive. This is a quick clue if you can’t see markings.
Manufacturer Markings
Check the speaker basket or back for “+” or “–” symbols, which usually match the terminals.
Tracing Wires With A Tone Generator
For more complex installations, a tone generator (also called a “fox and hound” or wire tracer) can help. This tool sends a signal through a wire, which you can detect with a handheld probe. This is helpful for:
- Cars with many wires or aftermarket installations
- Locating speaker wires behind the dash or in door panels
- Confirming both wire ends belong to the same speaker
Most car audio shops use this method for speed and accuracy, but it’s optional for most DIYers.
Comparing Methods: Pros And Cons
Here’s a quick overview of the main ways to identify speaker wire polarity, with their advantages and drawbacks:
| Method | Pros | Cons |
|---|---|---|
| Color Codes | Quick and easy if codes are standard | Not universal; can be confusing if wires are faded or replaced |
| Physical Markings | No tools needed; works with many aftermarket wires | Not always present; can be hard to see |
| Multimeter | Very accurate; works with any wire | Requires a meter; may need to disconnect wires |
| Speaker Pop Test | Simple; no expensive tools needed | Must access speaker; not 100% foolproof |
| Tone Generator | Very reliable for complex systems | Special tool required; may be overkill for small jobs |

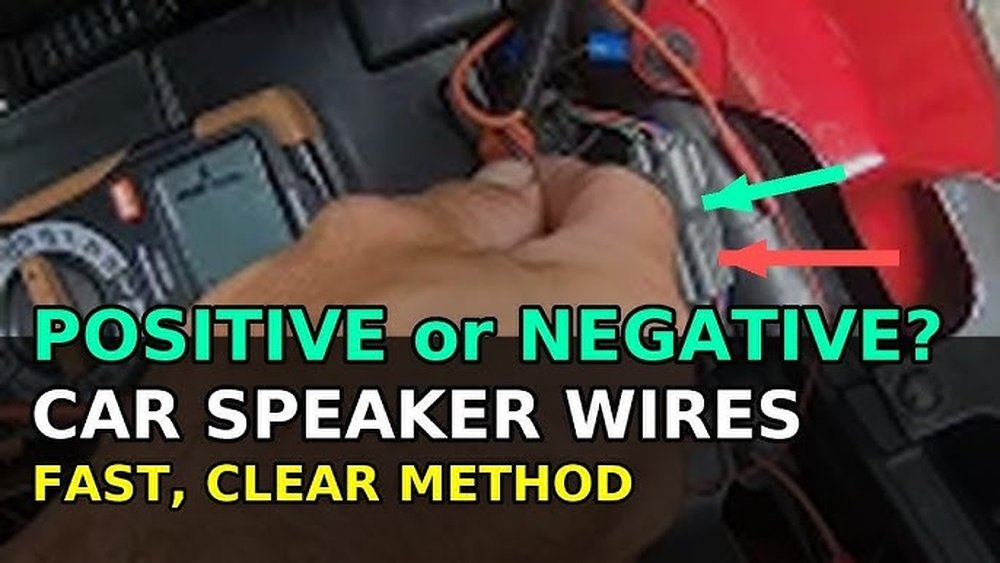
Credit: www.youtube.com
What If You Get The Wires Backwards?
Accidentally reversing positive and negative speaker wires is a common mistake, especially for beginners. Here’s what happens:
- Sound Issues: The most obvious effect is poor sound quality. Bass may disappear, vocals can sound distant, and the stereo “image” (where sounds seem to come from) may feel wrong.
- No Damage: Most modern speakers won’t be harmed by reversed polarity. The main risk is a bad listening experience, not equipment failure.
- Multiple Speakers: If only one speaker is reversed, the sound will be “out of phase” compared to the others. If all are reversed, you may not notice, but it’s still not ideal.
Tip most beginners miss: Always test your speakers after installation with music that has clear bass and vocals. Listen for weak or thin sound—this is often a sign of a polarity issue.
Car Speaker Wiring Mistakes To Avoid
Even careful installers can make mistakes. Here are some common errors and how to prevent them:
- Assuming Color Codes Are Universal: Always check your car’s diagram or test wires—never guess based on color alone.
- Skipping Testing: Always use a multimeter or speaker “pop” test when in doubt.
- Not Labeling Wires: Before disconnecting anything, label or photograph all wires to remember their positions.
- Mixing Up Wire Pairs: In multi-speaker setups, don’t mix left/right or front/rear pairs. Trace wires carefully.
- Using the Wrong Tools: Don’t use a high-voltage battery for speaker testing; it can damage the speaker.
- Ignoring Signs of Reversed Polarity: If the sound is “off,” double-check your wiring before closing everything up.
Real-world Example: Upgrading Door Speakers
Let’s walk through a practical example. Suppose you’re upgrading the front door speakers on a 2010 Toyota Camry. Here’s how you’d identify the positive and negative wires:
- Remove Door Panel: Gently pry off the panel and locate the speaker.
- Check Wire Colors: In many Toyotas, the light green wire is positive, and the purple is negative.
- Look for Markings: If the colors aren’t clear, look for a stripe, ribbing, or “+” symbol on the speaker terminal.
- Test with Multimeter or AA Battery: If unsure, use one of these methods to confirm which wire is positive.
- Label Wires: Use masking tape to mark each wire before disconnecting.
- Install New Speaker: Connect wires to the correct terminals (positive to “+”, negative to “–”).
- Test Sound: Play music to confirm the speaker sounds full and clear.
- Reinstall Panel: Once satisfied, put everything back together.
Non-obvious insight: Some cars use a factory amplifier that can reverse polarity for certain speakers. If your car has a premium sound system, check for hidden amplifiers and consult a wiring diagram before connecting new speakers.
Special Cases: Tweeters, Subwoofers, And Crossovers
Not all car speakers are the same. Identifying wires for tweeters (small speakers for high frequencies) or subwoofers (large speakers for bass) can be trickier.
Tweeters
Tweeters are often wired in parallel or series with main speakers, sometimes through a crossover (a small box or circuit). The same polarity rules apply, but wires may be thinner and harder to access.
Subwoofers
Aftermarket subwoofers may use thicker wires and custom colors. Always check the amplifier manual and use a multimeter if unsure.
Crossovers
If your system uses a crossover, it may have separate inputs for positive and negative. Mixing these up can damage the crossover or degrade sound quality.
Advanced Tools And Techniques
For those working on more complex systems or professional installations, advanced tools can help:
- Wire Tracer/Tone Generator: As described earlier, helps follow wires through the car.
- Polarity Tester: A special tool that plays a test tone and uses a small sensor to detect if the speaker is in phase.
- Oscilloscope: Rarely needed for car audio, but useful for troubleshooting odd electrical problems.
Most DIY car audio enthusiasts won’t need these, but knowing they exist can be helpful if you run into stubborn issues.
When To Seek Professional Help
Sometimes, identifying speaker wires becomes complicated—especially in luxury cars, vehicles with advanced sound systems, or after multiple repairs. Consider asking for professional help if:
- You can’t find a wiring diagram for your car
- The wires have been spliced or replaced with non-standard colors
- There’s a factory amplifier or signal processor you don’t understand
- You notice buzzing, distortion, or other electrical problems after connecting speakers
A professional installer will have access to tools and diagrams and can quickly resolve issues that might take hours for a beginner.
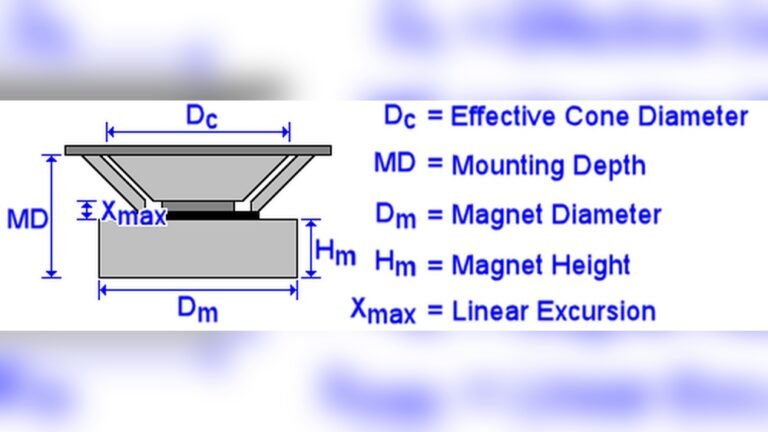
Understanding Speaker Wire Gauge And Quality
While not directly related to polarity, wire gauge (thickness) and quality can affect sound. Thicker wires (lower gauge numbers) are better for longer runs or high-power systems. For most car speakers, 18-gauge wire is sufficient, but subwoofers may require 16-gauge or thicker.
Tip: Avoid using old, corroded, or damaged wires. Poor connections can cause sound problems that look like polarity issues.
Speaker Wire Polarity And Sound Quality: The Science
When all speakers are wired with the correct polarity, their cones move in and out together. This reinforces bass and creates a natural soundstage. If one speaker is reversed, its cone moves opposite to the others, canceling out bass and distorting the stereo image. This is called phase cancellation.
Fun fact: In professional audio testing, a “polarity pulse” is often used to check speaker wiring. You can learn more about the science of audio polarity from sources like the Wikipedia: Speaker Polarity page.

Credit: www.reddit.com
Frequently Asked Questions
What Happens If I Connect Car Speaker Wires Backwards?
Connecting speaker wires backwards reverses polarity. This will not damage most modern speakers, but it can cause poor sound quality. You may notice weak bass, odd-sounding vocals, or a “hollow” audio experience. If only one speaker is reversed, the stereo image will be “off.
”
Credit: soundcertified.com
Can I Use A Household Battery To Test Speaker Wires?
Yes, a 1.5V AA or AAA battery can be used for a quick polarity test. Briefly touch the wires to the battery and watch the speaker cone. Outward movement means the wire on the battery’s positive end is the positive speaker wire. Do not use 9V or higher batteries—they can damage the speaker.
Are Car Speaker Wire Colors Universal?
No, car speaker wire color codes vary by manufacturer and even by model year. Never rely on color alone unless you have a verified wiring diagram for your exact car. Always double-check with physical markings or a test.
Do Aftermarket Speakers Use The Same Polarity Rules?
Yes, the same rules apply for aftermarket speakers. Positive and negative still matter for sound quality. Aftermarket wires may have different color codes or markings, so read the instructions carefully.
How Can I Find A Wiring Diagram For My Car?
You can find wiring diagrams in your car’s owner’s manual, service manual, or from reputable online sources. Many forums and car audio websites also share wiring diagrams for popular models. Always verify with multiple sources if possible.
Identifying positive and negative speaker wires in your car doesn’t have to be complicated. With a careful approach, the right tools, and a little patience, you can ensure your car audio system sounds its best. Take your time, double-check your work, and enjoy the upgrade in sound quality.