How Do You Fix a Blown Subwoofer: Step-by-Step Guide
A blown subwoofer can ruin your music or movie experience. The sound turns weak, distorted, or disappears completely. Many people think a blown subwoofer means it’s time to buy a new one. But that’s not always true. With basic tools and some patience, you can often fix a blown subwoofer yourself.
In this article, you’ll learn how to identify the problem, what parts may need repair, and how to bring your subwoofer back to life—even if you’ve never tried speaker repair before.
What Is A Blown Subwoofer?
When a subwoofer is “blown,” it means part of the speaker is damaged and can’t produce sound as intended. This usually happens from:
- Playing music too loud for long periods
- Sudden power surges
- Physical damage (dropping, poking the cone, etc.)
- Age and wear
Common signs include crackling, rattling, buzzing, or no sound at all. Sometimes, the subwoofer might only play at a low volume, even if you turn up the amplifier.
Symptoms Of A Blown Subwoofer
Recognizing the problem is the first step. Here are the most common symptoms:
- Distorted sound: The bass is unclear, and you hear buzzing or rattling noises.
- No sound: The subwoofer doesn’t make any noise, even though the amplifier is working.
- Low volume: The subwoofer plays, but it’s much quieter than usual.
- Physical damage: You can see tears, holes, or burns on the cone or surround.
Each symptom points to a different kind of problem. Identifying the symptom will help you choose the right fix.

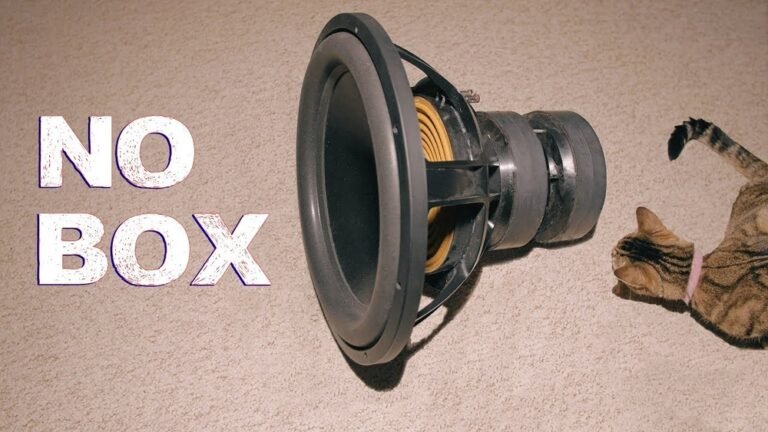
Credit: www.reddit.com
Tools And Materials Needed
Before you start the repair, gather these basic items:
- Screwdrivers (Phillips and flathead)
- Soldering iron and solder (for wire fixes)
- Replacement parts (cone, surround, or voice coil, depending on damage)
- Adhesive glue (for foam or rubber surrounds)
- Utility knife or scissors
- Multimeter (to test electrical connections)
- Clean cloth and rubbing alcohol
Having everything ready means you won’t have to stop mid-repair to find a tool.
How To Diagnose Subwoofer Problems
Diagnosing the problem saves time and money. Use these steps:
- Disconnect the subwoofer from the power source and amplifier.
- Inspect the cone for visible damage like tears, dents, or burns.
- Gently press the cone in and out. If you hear scratching, the voice coil may be damaged.
- Use a multimeter to check for electrical continuity. Set to Ohms (Ω) and touch the probes to the subwoofer’s terminals.
- A healthy subwoofer usually measures between 2–8 Ohms.
- A reading of “0” or “infinite” means a broken voice coil.
Example: Diagnosing A 4 Ohm Subwoofer
If your subwoofer should be 4 Ohms but the multimeter reads “open” or “infinite,” the voice coil is likely blown. If you get a normal reading but hear rattling, the cone or surround may be the problem.
Common Causes Of Subwoofer Failure
Knowing what caused the damage helps prevent it in the future. The most frequent causes are:
- Excessive power: Using an amplifier that’s too strong can burn the voice coil.
- Clipping: Distorted signals from a weak amplifier can damage the subwoofer.
- Physical impact: Dropping or bumping the subwoofer can tear the cone.
- Aging materials: Surrounds and cones dry out and crack over time.
Avoiding these can extend your subwoofer’s lifespan.
Step-by-step Guide To Fixing A Blown Subwoofer
1. Removing The Subwoofer
- Unplug the subwoofer from all power sources.
- Remove the screws holding the subwoofer in its box.
- Gently pull the subwoofer out, disconnecting any attached wires.
2. Inspecting The Damage
- Check the cone for tears or holes.
- Examine the surround (foam or rubber ring) for cracks.
- Look at the voice coil for signs of burning or breaks.
3. Fixing Minor Cone Or Surround Tears
Small tears in the cone or surround are the easiest to fix.
You’ll need:
- Speaker repair glue or rubber cement
- Thin tissue paper (for cone tears)
Steps:
- Clean the damaged area with rubbing alcohol.
- For a cone tear, place tissue paper over the hole and apply glue.
- For surround damage, apply glue to both sides of the crack.
- Let dry for several hours before reassembling.
4. Replacing The Surround
If the surround is badly damaged, replace it:
- Buy a surround repair kit that matches your subwoofer size.
- Remove the old surround with a utility knife.
- Clean the edges of the cone and frame.
- Glue the new surround in place, pressing gently until it dries.
5. Repairing Or Replacing The Voice Coil
A blown voice coil is more serious but still possible to fix if you’re patient.
Warning: If you’re new to repairs, this step takes time and focus.
Steps:
- Remove the cone and voice coil assembly carefully.
- Note how the wires connect to the terminals.
- If only a wire is detached, re-solder it.
- For burnt or melted coils, buy a replacement voice coil.
- Install the new coil, making sure it fits smoothly without scraping.
- Solder the wires to the terminals.
- Reassemble the subwoofer and test with a low volume signal.
6. Reassembling And Testing
- Carefully put the subwoofer back into its box.
- Reconnect all wires.
- Test the subwoofer at a low volume before returning to normal use.
Cost Comparison: Repair Vs Replacement
Repairing a subwoofer can be much cheaper than buying new. Here’s a quick comparison:
| Repair Type | Estimated Cost | DIY Difficulty |
|---|---|---|
| Minor cone/surround repair | $10–$20 | Easy |
| Surround replacement kit | $15–$30 | Moderate |
| Voice coil replacement | $30–$70 | Advanced |
| Buy new subwoofer | $60–$500+ | None |
Most basic repairs cost less than $30, while a new subwoofer is usually much more expensive.
Key Tips For Subwoofer Repair
- Always turn off power before working on electronics.
- Take photos as you disassemble parts, so you remember how to reassemble.
- If the cone is stiff or the coil scrapes after repair, stop and check alignment.
- Let glue dry completely before using the subwoofer.
- Test at low volume first to avoid new damage.
Practical Example: Fixing A Blown 12-inch Subwoofer
Let’s say you have a 12-inch car subwoofer with a torn surround.
Steps:
- Remove the subwoofer from the box.
- Test with a multimeter—reading is normal.
- Inspect the surround; find a large crack.
- Buy a 12-inch surround repair kit for $20.
- Remove old surround, clean surfaces, glue new surround.
- Let dry overnight, then reinstall and test.
Result: Subwoofer sounds as good as new for a fraction of the replacement cost.
When To Replace Instead Of Repair
Sometimes, repair is not the best option. Replace your subwoofer if:
- The cone and voice coil are both badly damaged.
- The cost of parts is more than half a new subwoofer’s price.
- You lack the tools or skills for complex repairs.
- The subwoofer is very old and other parts are worn out.

Credit: www.youtube.com
Subwoofer Repair: Quick Reference Table
To help you decide your next step, here’s a summary of common subwoofer problems and solutions:
| Problem | Repair Option | Success Rate |
|---|---|---|
| Small cone tear | Glue and tissue patch | High |
| Surround damage | Replace surround | High |
| Loose wire | Re-solder connection | Very High |
| Burned voice coil | Replace coil | Moderate |
| Crushed cone | Replace subwoofer | Low |
How To Prevent Future Damage
Protect your subwoofer by following these tips:
- Use an amplifier that matches your subwoofer’s power rating.
- Avoid playing music at maximum volume for long periods.
- Check for distortion—if you hear it, turn down the volume.
- Inspect wiring regularly to prevent shorts or loose connections.
- Keep the subwoofer in a clean, dry place to avoid dust and moisture.
Real-world Statistics
- According to speaker repair shops, over 60% of blown subwoofers are fixed by replacing the surround or repairing minor cone tears.
- Only about 15% need a full voice coil replacement.
- Most DIY repairs cost under $40 if you do not need special tools.
Common Mistakes To Avoid
- Rushing the repair process and not letting glue dry
- Using the wrong replacement parts (wrong size or type)
- Ignoring distorted sound, which can make problems worse
- Forgetting to disconnect power before starting repairs
Subwoofer Brands And Repair Difficulty
Some brands are easier to repair than others. Here’s a quick look:
| Brand | Repair Friendliness | Parts Availability |
|---|---|---|
| JL Audio | Moderate | Good |
| Pioneer | Easy | Excellent |
| Rockford Fosgate | Moderate | Good |
| Kicker | Easy | Excellent |
| Boss Audio | Hard | Poor |
If you have a popular brand, you’ll find more guides and parts online.
When To Get Professional Help
- If you’re not comfortable with soldering or electrical work
- If the subwoofer is under warranty—opening it may void the warranty
- If the repair needs special tools you don’t have
A professional repair shop can handle complex fixes and may offer a warranty on their work. The cost is usually between $50–$150, depending on the problem.

Credit: carvinaudio.com
Frequently Asked Questions
Can I Fix A Blown Subwoofer Without Any Experience?
Yes, many basic repairs like cone or surround repair are beginner-friendly. Follow guides and take your time. More complex repairs, like voice coil replacement, are better for those with some DIY skills.
How Do I Know If My Subwoofer Is Blown Or Just Disconnected?
Use a multimeter to test the subwoofer’s terminals. If you get a normal Ohm reading, the problem might be a loose or broken wire. If you get no reading, the voice coil is likely blown.
Is It Safe To Use Super Glue For Subwoofer Repair?
Super glue works for some small repairs but can become brittle. It’s better to use speaker repair glue or rubber cement for flexibility and longer-lasting results.
What If My Subwoofer Still Sounds Bad After Repair?
Double-check your work for loose wires, misaligned parts, or glue that hasn’t dried. Test with a different amplifier to rule out other issues. Sometimes, additional repair or a full replacement is needed.
Where Can I Find Replacement Parts For My Subwoofer?
You can find parts at electronics stores, online marketplaces, or directly from the manufacturer’s website. Always match the size and type to your subwoofer. For more details, see this Subwoofer Wikipedia page.
Fixing a blown subwoofer is a practical way to save money and learn more about your audio system. With patience and the right tools, you can restore great sound without buying new equipment.