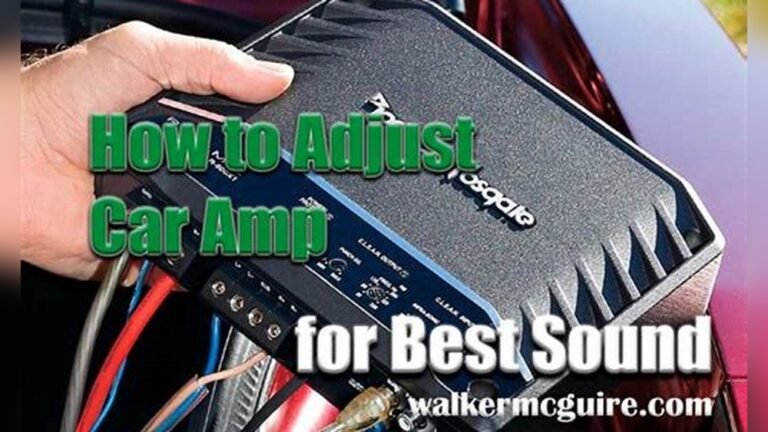
How to Adjust Your Car Amp With Oscillating Tool Easily
Adjusting your car amplifier is one of the best ways to improve your audio system. Many people use basic tools or rely on their ears, but using an oscillating tool makes the process more precise. Beginners often worry that amp tuning is complicated or risky. If you follow the right steps, you can avoid common mistakes and get a clear, powerful sound in your car.
This guide explains how to adjust your car amp with an oscillating tool, step by step. You’ll learn what tools you need, why an oscillating tool matters, and how to safely tune your amplifier for the best results. We’ll use simple words and short sentences to help anyone understand, even if you’re new to car audio.
What Is An Oscillating Tool?
An oscillating tool is a device that moves back and forth very quickly. In car audio, people use it to create a test tone or signal. This helps you see how your amplifier reacts at different settings.
- The tool connects to your amp’s input.
- It sends a steady frequency, like a 1,000 Hz tone.
- You can measure the amp’s output and adjust the settings for clear sound.
Oscillating tools are sometimes called signal generators. They are reliable for amp tuning because they make a consistent sound that helps you see exactly how your amp performs.
Why Use An Oscillating Tool For Amp Adjustment?
Beginners often ask, “Can’t I just use music?” Music is complex, with lots of frequencies. An oscillating tool gives you a single frequency. This makes it easy to:
- Find distortion
- Set the correct gain
- Avoid damaging your speakers
Using the right tool saves time and prevents mistakes. Here’s how it compares to ear tuning:
| Method | Accuracy | Risk of Speaker Damage | Time Required |
|---|---|---|---|
| Oscillating Tool | High | Low | 15-30 mins |
| By Ear | Low | High | 30-60 mins |
Most car audio professionals use signal generators for amp tuning. If you want clear sound and safe settings, an oscillating tool is your best choice.

Credit: www.homedepot.com
Tools And Materials Needed
Before you start, gather these tools:
- Oscillating tool or signal generator
- Amplifier wiring kit
- RCA cables
- Multimeter
- Screwdrivers
- Sound meter (optional)
- Car amp manual
Make sure your oscillating tool can output a test tone. Many smartphone apps act as signal generators, but a dedicated device gives better results.
Step-by-step Guide To Adjusting Your Car Amp
Follow these steps to safely adjust your amplifier with an oscillating tool. Each step is explained with short sentences and practical tips.
1. Prepare Your Car Audio System
- Turn off your car and disconnect the battery.
- Check all wiring. Loose wires can cause noise or damage.
- Make sure your amp and speakers are connected properly.
Many beginners skip checking connections. This leads to poor sound or even amp failure. Always double-check before tuning.
2. Connect The Oscillating Tool
- Plug the tool into your amp’s input (usually RCA).
- Choose a test tone (most people use 1,000 Hz for mids/highs or 40 Hz for subwoofer).
- Set the tool to a steady output.
Example: If you’re tuning a subwoofer amp, set your signal generator to 40 Hz. For full-range amps, use 1,000 Hz.
3. Set Your Head Unit Volume
- Turn the radio or head unit up to 75% of maximum volume.
- Don’t use full volume. This prevents distortion.
- Keep all EQ settings flat (no bass or treble boosts).
Many people forget to set EQ to flat. This affects amp tuning and can cause wrong settings.
4. Adjust Amplifier Gain
- Find the gain knob on your amp.
- Slowly turn the gain up until you hear distortion.
- Use a multimeter to check voltage if you want more accuracy.
Stop as soon as you hear distortion, then turn gain down slightly. This is your amp’s clean output limit.
Here’s a quick comparison of gain adjustment methods:
| Method | Precision | Difficulty |
|---|---|---|
| By Ear | Medium | Easy |
| With Multimeter | High | Medium |
| With Oscillating Tool | Very High | Medium |
5. Set Filter Controls
- Adjust the high-pass or low-pass filter knobs.
- For subwoofers, set the low-pass filter between 80-120 Hz.
- For speakers, set the high-pass filter at 80 Hz or higher.
Filters stop unwanted frequencies from reaching your speakers. This protects them and makes the sound clearer.
6. Fine-tune Bass And Treble
- Use your amp’s bass boost or treble controls carefully.
- Start with all boosts off, then add a little if needed.
- Listen for distortion or rattling.
Many beginners add too much bass boost. This can damage your speakers and reduce sound quality.
7. Test And Listen
- Play a song you know well.
- Listen for clarity and balance.
- If the sound is harsh or distorted, repeat steps 4-6.
Testing with real music helps you check for any problems missed during tuning.
Practical Example: Tuning A Subwoofer Amp
Let’s walk through a real example. Imagine you have a 500-watt subwoofer amp and a signal generator app.
- Connect the signal generator to the amp’s input.
- Set the app to output a 40 Hz tone.
- Turn your head unit to 75% volume.
- Adjust the gain until the subwoofer starts distorting, then back off slightly.
- Set the low-pass filter to 100 Hz.
- Check bass boost—add only if you don’t hear distortion.
- Play a bass-heavy song and listen.
Most users notice immediate improvement. The bass becomes clearer, and there’s less rattling or “boomy” sound.
Common Mistakes To Avoid
Many beginners make the same errors. Here’s how to avoid them:
- Skipping battery disconnect: Always turn off power before touching wiring.
- Using wrong test tone: Choose the right frequency for your amp type.
- Setting gain too high: This causes distortion and damages speakers.
- Boosting EQ during tuning: Keep all equalizer settings flat.
- Ignoring filters: Filters protect your speakers from bad frequencies.
If you avoid these mistakes, your amp will last longer and sound better.
Data: Amp Settings Vs Speaker Life
Correct amp settings can double or triple speaker life. Here’s a quick data table:
| Setting | Average Speaker Lifespan | Sound Quality |
|---|---|---|
| Properly Tuned | 4-6 years | High |
| Gain Too High | 1-2 years | Poor |
| No Filters | 2-3 years | Medium |
Taking time to tune your amp properly can save you money on repairs and replacements.
Tips For Better Results
- Use a real signal generator. Apps work, but dedicated tools are more accurate.
- Check your amp manual. It often lists recommended settings.
- Tune in a quiet place. Background noise makes it hard to hear distortion.
- Keep a record. Write down your settings in case you need to retune later.
Many beginners overlook the importance of quiet tuning spaces. Even small background noises can hide distortion.

Credit: www.harborfreight.com
Advanced Tuning: Multimeter Method
If you want more precision, use a multimeter:
- Set your signal generator to the desired frequency.
- Calculate target voltage using the formula: Voltage = sqrt(Watts x Ohms).
- Measure amp output at the speaker terminals.
- Adjust gain until you reach target voltage, then stop.
This method gives you exact control. It’s popular with audio professionals.
Safety Precautions
- Never adjust amp with power on. Disconnect battery before changing wiring.
- Don’t touch metal parts while tuning. Risk of shock or short circuit.
- Start with low gain. Increase slowly to avoid sudden loud sounds.
Safety is often ignored. Always protect yourself and your equipment.
How To Choose The Right Oscillating Tool
If you’re buying your first oscillating tool, consider these points:
- Frequency range: Should cover 20 Hz to 20,000 Hz.
- Output type: RCA is standard for car amps.
- Accuracy: Look for consistent signal, not just loudness.
- Price: Good tools range from $20 to $100.
Comparing popular models:
| Brand | Frequency Range | Output Type | Price (USD) |
|---|---|---|---|
| MiniDSP | 10 Hz – 20 kHz | RCA | $80 |
| Dayton Audio | 20 Hz – 20 kHz | RCA | $35 |
| Smartphone App | 20 Hz – 20 kHz | Headphone Jack | Free – $5 |
A dedicated tool like Dayton Audio gives more reliable results than most apps.
Real-life Results: What To Expect
After tuning your amp with an oscillating tool, you should notice:
- Cleaner sound: Less distortion, more clarity.
- Better bass: Tight, punchy low notes.
- Longer speaker life: Less risk of damage.
- Balanced volume: No sudden loud or soft spots.
Many users report a 30-50% improvement in sound quality after using a signal generator. If you want the best from your car audio, this step is worth your time.
For more technical details, visit Crutchfield, which offers in-depth guides and expert advice on car audio tools.
Credit: www2.parklanejewelry.com
Frequently Asked Questions
What Is The Best Frequency For Amp Tuning?
Use 1,000 Hz for mids/highs and 40 Hz for subwoofers. These frequencies are clear and easy to hear.
Can I Use A Smartphone App As An Oscillating Tool?
Yes, but dedicated signal generators are more accurate. Apps are good for beginners but may not give a perfectly steady signal.
How Often Should I Tune My Car Amp?
Tune your amp when you change speakers, add a subwoofer, or notice distortion. If nothing changes, once a year is enough.
Is It Safe To Tune My Amp Myself?
Yes, if you follow safety steps and use the right tools. Always disconnect the battery before working on wiring.
Do I Need A Multimeter For Amp Tuning?
No, but it helps with accuracy. Beginners can tune by ear, but a multimeter gives precise results.
Tuning your car amp with an oscillating tool is easy and safe if you follow these steps. You’ll get better sound, longer speaker life, and more enjoyment from your music. Take your time and check each setting—your ears will thank you.