How to Port a Sealed Sub Box for Deeper, Louder Bass
If you love deep, powerful bass in your car or home, you might start with a sealed subwoofer box. Sealed boxes are easy to build and sound clean, but sometimes you want more volume or lower bass. That’s where ported boxes come in. Many people wonder if you can simply port a sealed sub box instead of buying or building a new one. The answer is yes—but it takes planning, some math, and the right tools. This guide will show you, step by step, how to port a sealed sub box, why it matters, and how to avoid common mistakes. Even if you’re a beginner, you’ll finish with the confidence to improve your bass.
What Does “porting A Sub Box” Mean?
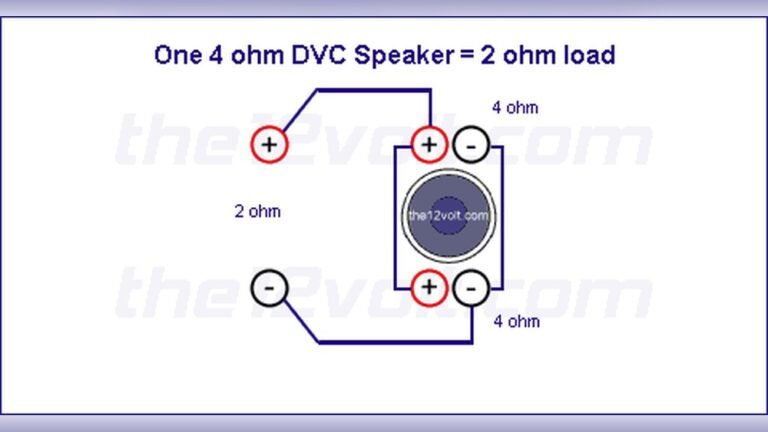
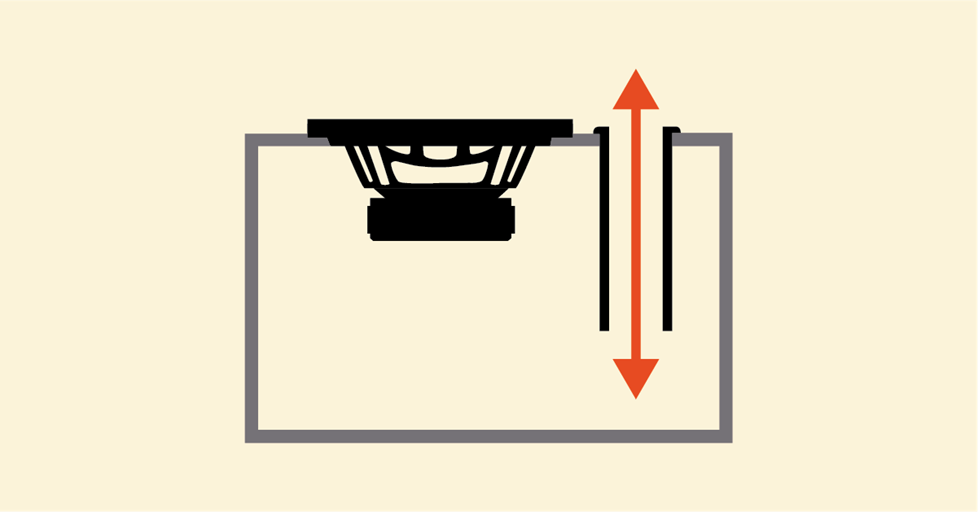
Porting means adding a vent or tube (the “port”) to your subwoofer box. The port lets air move in and out as the subwoofer cone moves. This changes how the box and subwoofer interact, giving you more bass output, especially at lower frequencies.
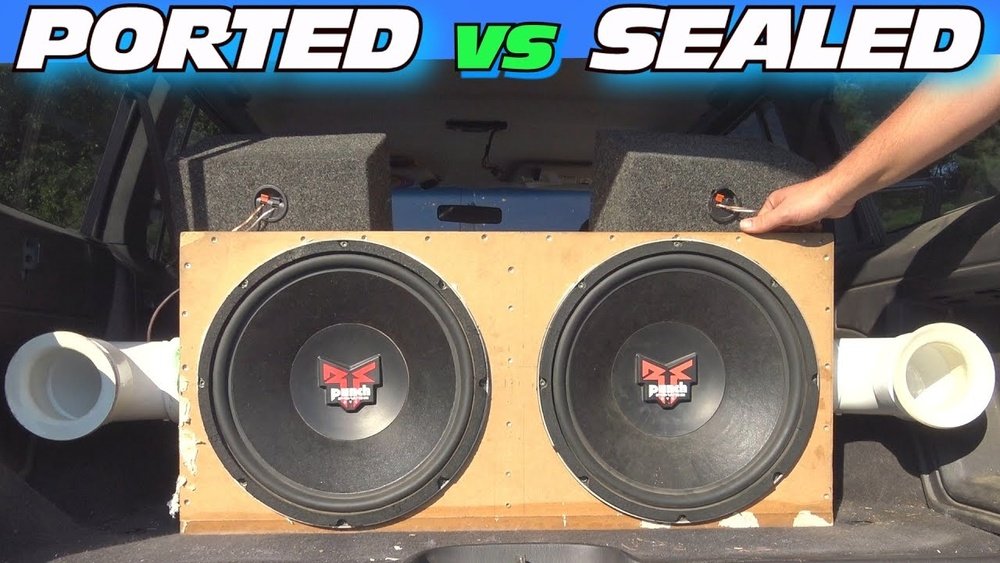
Sealed Vs Ported: Basic Differences
Let’s compare sealed and ported boxes for a clear understanding:
| Feature | Sealed Box | Ported Box |
|---|---|---|
| Bass Sound | Tight, accurate | Louder, deeper |
| Box Size | Smaller | Larger |
| Complexity | Easy | More advanced |
| Power Handling | Higher | Lower |
| Efficiency | Lower | Higher |
Key insight: Ported boxes give louder bass, but require exact box and port size for best results. If you port a sealed box without calculations, the sound might get worse, not better.
Why Port A Sealed Sub Box?
Before you start cutting, it’s smart to ask: why port a sealed box?
- More bass volume: Ported boxes can produce up to 3 dB more bass at low frequencies than sealed boxes, using the same amplifier power.
- Lower bass extension: You can tune the box to play deeper notes (20-30 Hz), perfect for hip-hop, EDM, or movie soundtracks.
- Better efficiency: The subwoofer doesn’t have to work as hard to produce the same volume.
But: Porting isn’t always better. If you love tight, punchy bass, a sealed box is still a great choice. Ported boxes need careful design or you’ll hear distortion or “boomy” bass.
Can Every Sealed Sub Box Be Ported?
Not all sealed boxes are good candidates for porting. Here’s how to check if yours is suitable:
- Box size: Ported boxes are usually larger. If your sealed box is too small, porting will not work well.
- Subwoofer type: Some subwoofers are designed for sealed boxes only. Look for the manufacturer’s recommendation or model number.
- Box material: The box should be made of 3/4” MDF or thicker. Thin boxes can leak air or vibrate.
- Space for the port: You need room on the box for the port tube or slot, without blocking the subwoofer or hitting the wall inside.
Example: If your sealed box is only 0.5 cubic feet for a 12” subwoofer, it’s probably too small for porting. For a 1.25 cubic foot box, porting is possible with the right tube.
Tools And Materials You’ll Need
Before you start, gather these tools and materials:
- Jigsaw or hole saw (for cutting the port hole)
- Drill and drill bits
- Measuring tape and ruler
- Port tube or PVC pipe (usually 3” or 4” diameter, length depends on tuning)
- Wood glue and caulk (for sealing)
- Screws
- Sandpaper
- Marker or pencil
- Subwoofer T/S parameters (Thiele/Small specs—see your subwoofer manual or manufacturer site)
Calculating The Right Port Size And Tuning Frequency
This is the most important—and often the most confusing—step. The port size and box volume decide your final bass sound. The goal is to “tune” your box to the right frequency (often between 32-38 Hz for car audio).
Step-by-step Calculation
- Measure your box’s internal volume.
- Remove the subwoofer.
- Measure the inside width, height, and depth (in inches).
- Multiply: Width x Height x Depth = Volume in cubic inches.
- Divide by 1,728 to get cubic feet.
- Subtract the subwoofer and bracing volume.
- Subwoofer usually takes about 0.1-0.15 cubic feet.
- Pick your tuning frequency.
- Common: 32 Hz for deep bass, 36 Hz for punchier, louder bass.
- Use a port calculator.
- Free online calculators (like the one at DIY Audio & Video) let you enter your box volume, port diameter, and tuning frequency. They will tell you the port length.
- Choose port diameter.
- 3” for 8” or 10” subs, 4” for 12” or 15” subs. Bigger is better to avoid “port noise.”
Example Calculation
Suppose your box is 14” high, 16” wide, and 13” deep inside.
- 14 x 16 x 13 = 2,912 cubic inches
- 2,912 / 1,728 = 1.68 cubic feet
- Subtract 0.12 for subwoofer = 1.56 cubic feet
- Tuning frequency: 34 Hz
- Port diameter: 4”
Enter into the calculator, and you get a port length around 14 inches.
Non-obvious insight: Always round up the port length a little. You can make the port shorter if the bass is too “boomy,” but you can’t add length back easily.
How To Cut And Install The Port
Now you have the plan. Here’s how to add the port to your sealed box.
- Mark the spot for your port.
- Choose a flat spot on the box, away from edges and corners.
- Avoid placing the port too close to the subwoofer or the inside wall (at least the diameter of the port away).
- Cut the hole.
- Use a hole saw for a round port or a jigsaw for a slot port.
- Sand the edges smooth to avoid air leaks.
- Install the port tube.
- Test-fit the tube. It should be snug.
- Seal around the tube with wood glue and caulk, both inside and outside.
- Screw a mounting flange if your port has one.
- Seal all leaks.
- Run caulk along all seams inside the box.
- Check the subwoofer hole and wire terminals for leaks.
- Test before final assembly.
- Temporarily hook up the subwoofer.
- Play bass-heavy music at low volume. Listen for rattles, air leaks, or “chuffing” noises.
- Adjust the port length if possible.
Pro tip: If your port tube is too long to fit inside, use an elbow joint (like a PVC 90-degree bend). Just make sure the total length is correct.
Common Mistakes To Avoid
Many beginners make the same errors when porting a sealed box. Here’s what to watch for:
- Wrong box volume: Too small, and the bass will be weak or boomy. Too large, and the sub might “bottom out” (hit its limit).
- Port too short or too narrow: Causes “port noise,” a whistling or chuffing sound at high volume.
- Not sealing leaks: Air leaks ruin ported box performance. Seal every seam.
- Ignoring subwoofer specs: Some subs are not designed for ported boxes—they can sound muddy or get damaged.
- Not using a subsonic filter: With ported boxes, bass below the tuning frequency can damage your sub. A subsonic filter cuts these dangerous notes.
Testing And Fine-tuning Your Ported Sub Box
After you finish, testing is important. Here’s how to get the best sound:
- Listen to different music types.
- Try hip-hop, rock, and electronic tracks.
- Notice if the bass is “tight” or “boomy.”
- Adjust port length if needed.
- Shorter port = higher tuning (more punch, less depth)
- Longer port = lower tuning (deeper bass, but less punch)
- Check for port noise.
- If you hear whistling, try a larger diameter port or smooth the edges.
- Use an amplifier with a subsonic filter.
- Set the filter just below your tuning frequency (for example, 30 Hz if tuning at 32 Hz).
Credit: www.crutchfield.com
Example: Before And After Porting
Let’s look at a typical result when porting a sealed box.
| Parameter | Sealed Box | Ported Box |
|---|---|---|
| Box Volume | 1.2 ft³ | 1.2 ft³ (with port added) |
| Tuning Frequency | N/A | 34 Hz |
| SPL Output (at 35 Hz) | 87 dB | 90 dB |
| Low Bass Response | Moderate | Deep, extended |
| Power Handling | Higher | Lower |
As you can see, porting gives a clear boost in bass output and low-end response, but you trade a bit of power handling and tightness.
Safety Tips
Don’t forget safety:
- Wear eye protection when cutting MDF.
- Use a mask—MDF dust is harmful.
- Work in a well-ventilated area.
- Always unplug power tools before changing blades.

Credit: www.youtube.com
When Should You Build A New Box Instead?
Sometimes, it’s better to build a new ported box than to port your old sealed one. Choose a new box if:
- Your sealed box is too small for porting.
- The box is made from thin or weak material.
- You want a custom shape or finish.
- You’re planning to upgrade your subwoofer.
Building from scratch lets you design the perfect box for your sub and space.
Frequently Asked Questions
Can I Just Add A Port To Any Sealed Box?
Not always. The box must have enough internal volume for ported operation, and your subwoofer should be compatible with ported enclosures. Check the manufacturer’s recommendations before starting.
What Happens If My Port Is Too Short Or Too Long?
A port that’s too short will tune the box too high, making the bass “boomy” and risking subwoofer damage. Too long, and the bass will be weak. Always use a port calculator and test the sound.
What Is “port Noise” And How Do I Avoid It?
Port noise is a whistling or chuffing sound from air moving too fast through a small port. Use a larger diameter port and smooth the edges to reduce this noise.
How Do I Know My Tuning Frequency Is Right?
Listen to different music styles. If the bass sounds clean, deep, and not “boomy,” your tuning is close. Adjust the port length in small steps if needed. An online frequency sweep can help you find the “sweet spot. ”
Do I Need A Subsonic Filter With A Ported Box?
Yes, a subsonic filter protects your subwoofer from damaging frequencies below the tuning point. Set it just below your tuning frequency for best safety and performance.
Porting a sealed sub box can give you a whole new level of bass if done right. Take your time with the calculations, use the right tools, and always double-check your work. With a careful approach, you’ll enjoy bigger, deeper bass that transforms your audio experience. For more technical details and calculators, check trusted resources like Crutchfield.

Credit: www.amazon.com