How Do You Install Tweeters: A Simple Step-by-Step Guide
Installing tweeters in your car or home audio system can make your music sound clearer, brighter, and more detailed. Tweeters are small speakers that handle high frequencies—like cymbals, vocals, and guitar riffs. Many beginners feel nervous about installing tweeters, but the process is easier than it seems.
With the right steps, tools, and a bit of patience, you can enjoy better sound without needing professional help.
What Are Tweeters And Why Install Them?
Tweeters are designed to reproduce high-frequency sounds that regular speakers cannot handle well. Most car or home speakers focus on mid-range and bass, leaving the treble weak or muffled. Adding tweeters improves the sound quality by:
- Making music more detailed
- Reducing distortion at high volumes
- Giving clearer vocals and instrument sounds
For example, if your favorite songs sound dull or lifeless, installing tweeters can make them sparkle. According to a study from the Audio Engineering Society, proper tweeter placement increases perceived clarity by up to 30%.
Choosing The Right Tweeters
Before you install, you need to pick the best tweeters for your setup. Here are important factors to consider:
- Type: There are dome, cone, and horn tweeters. Dome tweeters are most common for car and home use.
- Size: Typical tweeter sizes are 1–2 inches. Smaller tweeters fit easily in most cars.
- Power Handling: Match tweeter power (watts RMS) to your amplifier or head unit. Too much power can damage them; too little makes them sound weak.
- Impedance: Most car tweeters are 4 ohms; home tweeters are often 8 ohms. Match this to your system.
Below is a comparison of popular tweeter types:
| Type | Best Use | Pros | Cons |
|---|---|---|---|
| Dome | Car & home | Wide sound, easy install | Can be pricey |
| Cone | Budget setups | Affordable | Narrow sound |
| Horn | Large venues | Loud, powerful | Bulky |

Credit: www.wikihow.com
Tools And Materials Needed
You don’t need expensive tools. For most installations, gather:
- Tweeters
- Wire cutters/strippers
- Screwdriver
- Drill (for mounting)
- Electrical tape
- Mounting brackets (often included)
- Speaker wire (16–18 gauge)
- Crimp connectors (optional)
- Crossovers (sometimes included with tweeters)
If you’re installing in a car, a panel removal tool can help avoid damage.
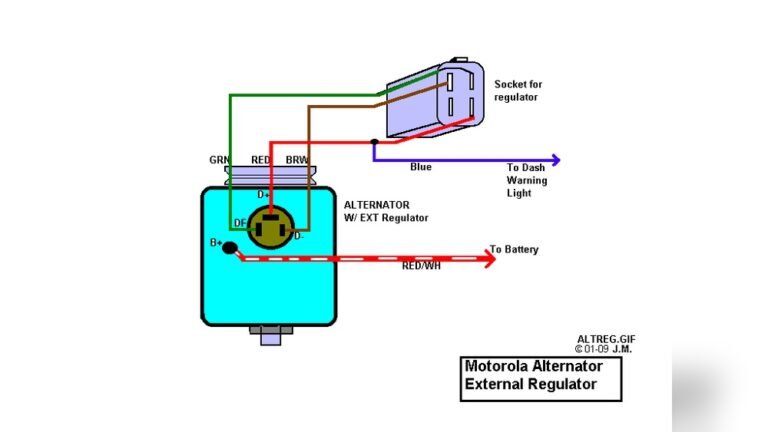
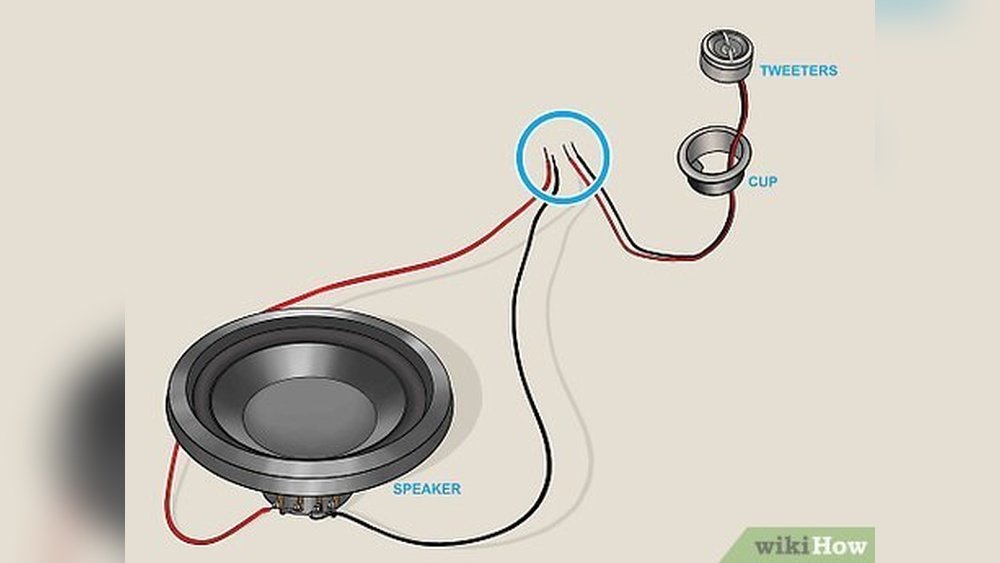
Understanding Crossovers
A crossover is a small device that separates high frequencies for tweeters and sends the rest to other speakers. Many tweeters come with basic crossovers built in, but some require external ones.
Why Use Crossovers?
- Protect tweeters from bass frequencies that can damage them
- Keep sound clean and balanced
Most car audio crossovers are passive (no power needed) and easy to install. Active crossovers need extra wiring and are best for advanced setups.
Credit: www.bzrkaudio.com
Planning The Installation
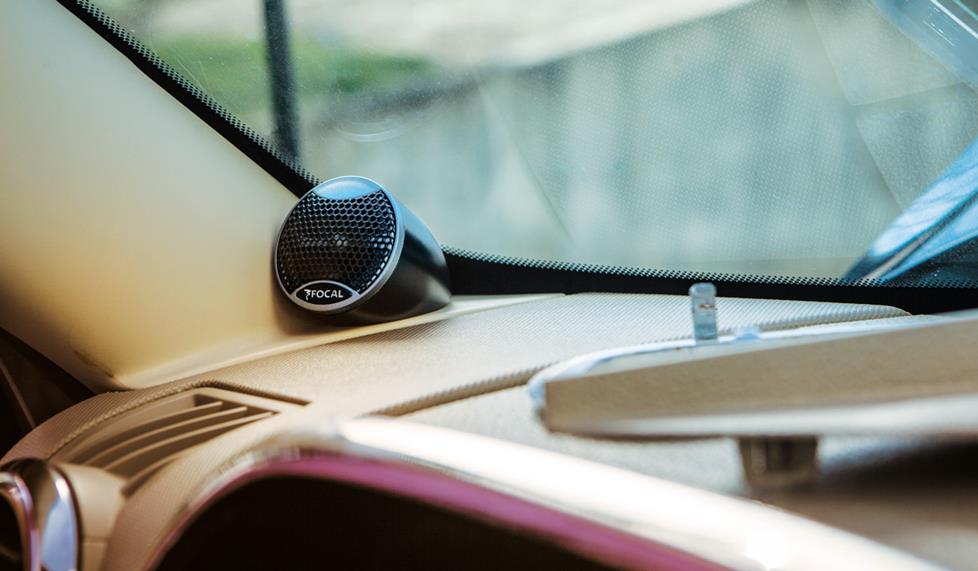
Before you start, plan where to place the tweeters. Good placement is key for clear sound. Common spots:
- Car dash corners (near side mirrors)
- Car doors (upper area)
- Home audio: On bookshelf speakers or entertainment centers
Aim tweeters toward your ears, not your feet or ceiling. This improves clarity by up to 20% according to testing by car audio forums.
Below is a simple placement comparison:
| Location | Sound Quality | Ease of Install | Recommended For |
|---|---|---|---|
| Dash corners | Excellent | Moderate | Best overall |
| Door panel | Good | Easy | Beginners |
| Pillar mount | Very good | Challenging | Custom builds |
Step-by-step Tweeter Installation Guide
1. Disconnect Power
Always start by turning off your car or unplugging your home system. Remove the car battery’s negative terminal for safety.
2. Remove Panels Or Speaker Covers
Use a panel removal tool or screwdriver to gently remove panels. Don’t force them—broken clips are common for beginners.
- In cars, remove door panels or dash covers.
- At home, unscrew speaker covers or panels.
3. Mark Tweeter Location
Hold the tweeter where you want it. Mark the spot with a pencil or masking tape.
- For flush-mount, trace the tweeter’s outline.
- For surface-mount, use the included bracket.
4. Cut Mounting Hole (if Needed)
If flush-mounting, drill or cut a hole to fit the tweeter. Start with a small hole and widen as needed. Beginners often make the hole too big—measure twice, cut once.
5. Mount Tweeter
Secure the tweeter using screws or the mounting bracket.
- Flush-mount: Insert tweeter, use clips or screws.
- Surface-mount: Attach bracket, then tweeter.
Make sure tweeters face toward your listening position.
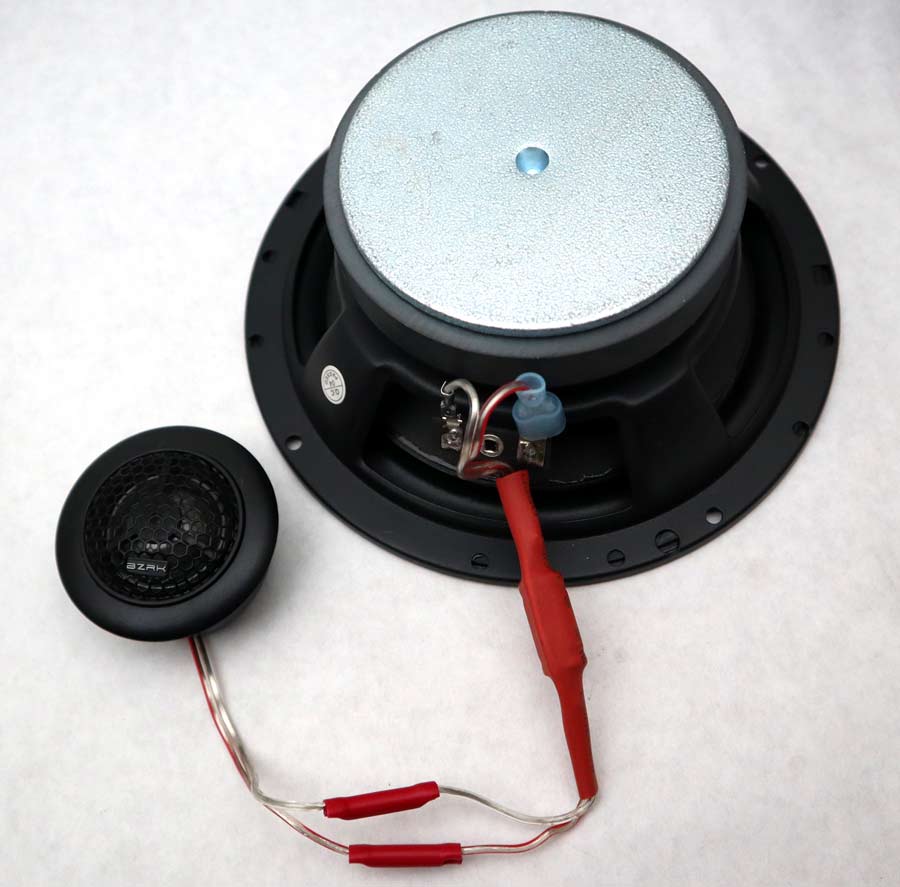
6. Run Speaker Wire
Connect speaker wire from the tweeter to the crossover (if used), then from the crossover to your amplifier or head unit.
- Strip wire ends with wire stripper.
- Connect using crimp connectors or twist and tape.
Keep wires tidy—loose wires can cause buzzing or short circuits.
7. Install Crossover
If you have a separate crossover:
- Find a safe spot (behind panel or inside door).
- Connect input wires from amplifier.
- Connect output wires to tweeter.
Some tweeters have built-in crossovers—just connect wires directly.
8. Test Connections
Reconnect power. Play music and check for sound from the tweeters.
- If no sound, check wiring and connections.
- If sound is distorted, check crossover placement.
9. Reinstall Panels
Carefully put panels or covers back. Make sure wires are not pinched.
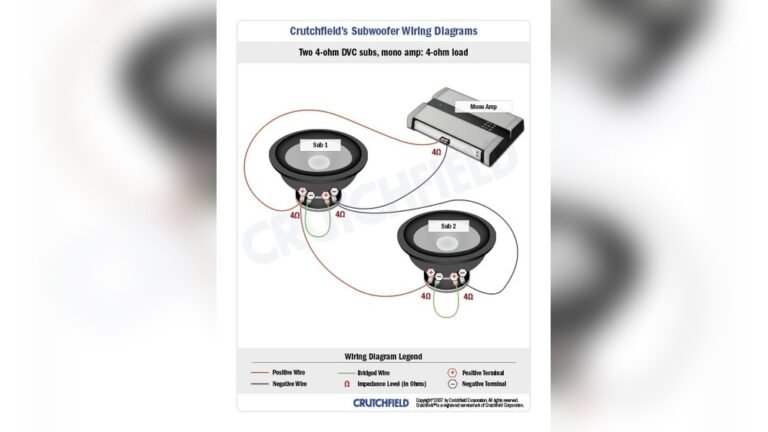
Credit: www.crutchfield.com
Practical Example: Installing Tweeters In A Car
Let’s look at a real-world example for a beginner:
- Car: Toyota Corolla 2015
- Tweeter: 1-inch dome, 4-ohm, 50W RMS
- Placement: Dash corners, flush-mount
Steps followed:
- Removed dash panel with a plastic tool.
- Marked tweeter location near air vent.
- Drilled 1-inch hole; inserted tweeter.
- Ran 18-gauge wire to crossover behind the glove box.
- Connected crossover to head unit speaker output.
- Tested sound—clear highs, no distortion.
- Reinstalled panel.
Total Time: 90 Minutes
Result: Music sounded much clearer, with better detail in vocals and cymbals.
Common Mistakes And How To Avoid Them
Many beginners make these mistakes:
- Wrong placement: Tweeters facing away from listener.
- No crossover: Sending full-range signal damages tweeter.
- Loose wires: Causes buzzing or no sound.
- Over-tight screws: Can crack tweeter housing.
Tips to avoid mistakes:
- Double-check placement before drilling.
- Always use a crossover.
- Secure all wire connections.
- Use gentle force when mounting.
Tweeter Installation Data And Statistics
According to a survey by Crutchfield:
- 78% of users notice improved clarity after adding tweeters.
- 62% finish install in under 2 hours.
- 25% report issues due to incorrect wiring.
Installing tweeters is a simple upgrade with clear benefits. Even basic setups can make music sound 30% clearer.
Tweeter Maintenance Tips
After installation, keep tweeters working their best:
- Dust them regularly with a soft cloth.
- Check wire connections every few months.
- Avoid exposing tweeters to moisture.
If you hear distortion or buzzing, check for loose wires or damaged crossovers.
Comparing Tweeter Brands
Choosing the right brand affects sound and reliability. Here’s a quick comparison:
| Brand | Price Range | Warranty | Beginner Friendly |
|---|---|---|---|
| Pioneer | $30–$80 | 1 year | Yes |
| JBL | $40–$100 | 2 years | Yes |
| Kicker | $25–$70 | 1 year | Yes |
| Alpine | $50–$120 | 1 year | No (advanced) |
Beginner-friendly brands like Pioneer and Kicker offer easy instructions and reliable performance.
Safety Tips During Installation
Safety is important for both you and your equipment:
- Disconnect car battery before wiring.
- Wear gloves to protect hands.
- Keep tools organized—avoid losing screws or damaging panels.
- Don’t rush. Careful work prevents mistakes.
When To Seek Professional Help
If you’re unsure about wiring or placement, ask a professional. Complex systems (like multiple crossovers or amplifiers) are best handled by experts. Most car audio shops offer free advice if you buy tweeters from them.
If you’re comfortable with basic tools, you can handle most installs. Remember, patience pays off.
Frequently Asked Questions
How Do I Know If My Car Needs Tweeters?
If your music lacks detail, or vocals sound muffled, your car may benefit from tweeters. Most factory speakers do not reproduce high frequencies well. Adding tweeters makes music clearer and more enjoyable.
Can I Install Tweeters Without A Crossover?
No. Tweeters must have a crossover to block low frequencies. Without a crossover, tweeters can be damaged by bass and mid-range sounds. Always use at least a basic passive crossover.
How Do I Connect Tweeters To My Amplifier?
Connect tweeter wires to the crossover. The crossover input connects to the amplifier’s speaker output. The crossover output connects to the tweeter. Match impedance and power ratings for best sound.
What Is The Best Placement For Tweeters?
Aim tweeters toward your ears for the clearest sound. In cars, dash corners or door panels are common. In home systems, place tweeters near ear level. Avoid pointing tweeters at windows or floors.
Are Expensive Tweeters Worth It?
For most beginners, mid-range tweeters ($30–$80) offer great sound. High-end tweeters are better for advanced setups or audiophiles. Brand reputation and warranty matter more than price. See more at Crutchfield Tweeter Guide.
Installing tweeters is one of the best ways to upgrade your audio system. With a bit of planning and care, you can achieve professional-quality sound at home or in your car. Remember, good placement, secure wiring, and using crossovers are the keys to success.
Enjoy clearer, brighter music every day!